Here for a Hop or GIVEAWAY??? Use these QUICK LINKS to find the right spot fast!! :)

Subscribe via email

Enter your email address:

Delivered by FeedBurner

Monday, June 18, 2012

Paper Playtime Ch# 77 -- Anything Goes!! Washi-Washi-Washi Tape Love... :)

Good Monday morning, Fabulous Friends!!  I love Mondays...  Don't YOU???  Come on, if you say it enough times, you might believe it, right???  :)  LOL...  I really DO love the first and third Mondays because it means that it's time again for another Paper Playtime Challenge!! Yee-Haw!! :)  If you haven't yet entered any of the Paper Playtime Challenges, please be sure to pop on over there and check it out... There is a challenge on the 1st and 3rd Mondays of each month!! On the FIRST Monday it's a DELICIOUS DIE CUT CHALLENGE... And on the THIRD Monday it's a SAY IT WITH SENTIMENTS CHALLENGE (that's ME!!)... Each challenge has a FUN theme, so I hope you'll check it out and JOIN US for a good time!! :)

Now... On to my inspiration for the challenge (I hope I'll get to see what you create too!!)...

(Your project can be a scrapbook layout, mini album, card, altered frame, bookmark, anything!)
I decided to make a sweet card to share with someone special...  I was excited to use Washi Tape for the very first time!!  I can see myself getting pretty addicted to this stuff...  Yeah, I'm loving the Washi Tape...  Have you tried some yet???  Freckled Fawn has a TON of colors and styles available...
My card is a standard A2 base (4.25"x5.5").  After layering two strips of Washi Tape on the card front, I embossed it with my Cuttlebug "Polka Dots" embossing folder.  I also layered a small rectangle of white with Washi Tape to use as the center of my card front (it measures about 1.75"x3") and layered that on another piece of white (2"x3.25") before embossing that layer as well.  The bright pink layer measures 2.5"x3.75" and is adhered with foam tape for dimension.
My sentiment "Love you" can be found on the "Even More Food For Thought" Stamp Art Set from K Andrew Designs...  I heat embossed the sentiment in white on a 1.5" heart adhered with foam tape.  To finish off my card, I added some faux stitching with a pink fine tip marker...
I hope my "Love you" card brightens your day as much as your visit has brightened mine!!  Thanks so much for taking the time to share your day with me...  :)

We are sponsored this challenge by Freckled Fawn who is offering a $15 Gift Certificate! Anyone who enters can win no matter where you live!!!!! Challenge ends Noon EST on Saturday, June 30th. Winner announced in Monday, July 2nd's post with our new challenge theme.

Be sure to take a peek at what my fabulous Design Team Sisters have created as well:

And...  For those of you who are looking to join a WONDERFUL Design Team, be sure to check out the Pause, Dream, Enjoy Challenges DT Call -- It's a great opportunity to share your talent while meeting some awesome new friends!!  :)  Even if you have never applied for a team before, I encourage you to give it a try!!  Click on the button for all the details...  And GOOD LUCK!!  :)


Until next time,

Thursday, June 14, 2012

It's a 4th of July CELEBRATION at Decorate To Celebrate!!

Happy Thursday, everyone!!  It's super-dee-duper to see you today!!  It's the start of another BRAND NEW challenge over at the Decorate To Celebrate! Challenge Blog...  At DTC, we want to see your party supplies, your decorations, and everything else that goes along with a celebration -- You can enter any project -- yard signs, banners, cupcake toppers (even the cupcakes themselves!), centerpieces, and more (as long as it's not a card or layout)!!  I always have such fun with these challenges as they really make me think outside the box...  I invite you to hop on over there and check out the challenges -- You can see a list of the upcoming challenges HERE!!  :)

For challenge #27 we're creating projects for a 4th of July Party!!  It's no secret to my friends and family that this is one of my all-time FAVORITE holidays!!  I love the fireworks and sparklers, the cookouts, the time spent with loved ones, AND the actual meaning behind the day -- a celebration of INDEPENDENCE...  Aren't we fortunate to be able to enjoy something so valuable as FREEDOM???  So here's my project (it's already the centerpiece on my kitchen table in celebration of the 4th of July)...  I hope you like it!!
Doesn't that just make ya feel like celebrating???  This super-fun candy dish is filled with Dum-Dum Lollipops and sports a bottle rocket ready to light up the sky!!  :)
The bottle rocket die cut can be found on the Independence Day Cricut Solutions Cartridge...  I used my Gyspy to cut it as large as possible on a 12" cutting mat (it's about 11.5" tall).  I inked the edges of each layer with some caramel ink to give it a softer edge.
Silver Perfect Pearls add a bit of sparkle and a little bit more FUN to the bottle rocket...  I love the texture on this We R Memory Keepers cardstock...  It perfectly matches the designer cardstock I used for the candy dish (also from We R Memory Keepers -- Red, White & Blue line...  Available from my favorite LSS!!)
Have you tried one of these candy dishes yet???  If you haven't, I invite you to give it a whirl!!  I never realized how easy they were to make until I tried one (thank you, Kathy, for telling me how easy it was!)...  Feel free to use my pattern to make your own -- I'd love to see yours!!
Not that it has to be a candy dish...  You could use it for silverware or a gift box or fill it with flowers...  The possibilities are endless!!  I filled mine with these customized lollipops, but red, white & blue M&Ms would have been fun too -- I just wasn't gonna separate them from the bag of "regular" ones I had OR spend the time to paint them in festive colors!!  ;)  
Instead, while I chit-chatted on the phone to one of my favorite peeps, I wrapped each lollipop with a square of red tissue paper and colored little stars all over them with my white Gelly Roll pen...  Don't those look FUN???  And I'm sure it took much less time than individually painting M&Ms...  
Of course, no 4th of July party supply would be complete without a little wish for the holiday!!  I selected the "God bless the USA" sentiment found on the "Freedom Isn't Free" Stamp Art Set from K Andrew Designs...  Oh, I just love making little flag tags for goodies like this!!  :)  If you'd like to see more AMAZING projects with this stamp set, please be sure to visit this  Getting Cricky post!!
And there ya have it!!  I'm almost all set for MY 4th of July Celebration!!  What are YOUR plans for the holiday???  Are you spending time with family?  Heading to the beach?  Planning a fireworks extravaganza?  This 4th of July, as I kick back and enjoy a fabulous display of fireworks with some very special people in a very special spot, I'll be saying a WISH for YOU to be enjoying your day too...


In the meantime, I'd love to see what kind of projects YOU would make for YOUR 4th of July celebration???  Create 'em up and show us what you've got by linking up over at Decorate To Celebrate! before Tuesday, June 26th at 11:59pm EST...  I can't wait to see what ya make!!  :)

Until next time,

Thursday, June 7, 2012

Splashtastic Summer Preview -- Don't Flip Out!! :)

Ah, summer...  Kicking back, sipping lemonade by the pool, burying your toes in sandy beaches...  Who doesn't LOVE summer???  It seems to me that, no matter where you go in the summertime, you see more smiles, more laughs, and more good times than you do under a blanket of that cold, fluffy, white stuff!!  While I do love the change of seasons here in Pennsylvania, I most look forward to the summer months...

With the official start of summer just two weeks away, I'm glad to see the trees full of leaves, to hear the birds singing from early morning til late evening, and to smell the flowers in full bloom...  I'm also happy to be able to wear my flip flops to the grocery store without strange looks from bundled-boot-wearers who probably wonder what kind of person wears flip-flops in the dead of winter (they've obviously never experienced the true foot joy of wearing Rainbow flip-flops 24/7/365...).  Yeah, I love my flip flops...  Sooooooo, when I learned I'd be creating another project using one of my most favorite K Andrew Designs Stamp Art Sets, "Splashtastic Summer"...  Well, I just knew I was featuring my favorite shoes in all the world...
This fabulous flip-flops cut can be found on the Creative Memories Traveler Cricut Cartridge (available HERE)...  I cut mine at 3.5" (all layers).  The pink layer was embossed with the Sizzix Daisies and Vines embossing folder, and I added two of my little yellow gem flowers to the strap.
Since I wanted to add one of my homemade Wiggle Wires to the flip flops, I decided to make this an easel card (aren't they just more FUN to display???)...  When the card is closed, you see only the flip flops and "don't flip out" sentiment.  Upon propping it open, you can enjoy the Wiggle that makes me Giggle as well as the "Enjoy the summer" sentiment found on the inside of the card!!  :)
I'm having LOTS of fun playing with Kristal's new line of twine (did you know I have a TWINE GIVEAWAY HERE???  Be sure to check it out for your chance to win a sample pack of 14 colors!!)...
Since I love the fun addition of texture on my cards and projects, I chose the Cuttlebug "Polka Dots" embossing folder for the blue background of my card...  A few of my gem flowers finish off the sentiment circles, and this card is ready for sending!!  This lucky card is going all the way to the Sunshine State to surprise a very special mom...  She is someone who is cheerful and happy every time I get the opportunity to talk to her, and I hope this card makes her smile the way she has helped me smile too!!  ;)
Ya know what ELSE I hope???  I hope that YOU enjoy YOUR summer too!!  Find that favorite pair of flip-flops, kick back with a book and a lemonade, and breathe in some SUNSHINE!!  :)  And when you're ready to do some creative crafting, remember that this FUN stamp set full of adorable sentiments can be YOURS...  Simply click on the preview for ordering details...

K Andrew Designs

Wanna see some of my other favorite projects that I've created with this set???  It's so versatile and FUN...  Don'tcha think???

As you can see, there are SO many possibilities for this WONDERFUL stamp set!!  For even more ideas, be sure to pop over to the Getting Cricky blog for today's post -- Where my sweet Design Team Sister, Miranda, also has some FUN projects to share with you!!

Until next time,

Sunday, June 3, 2012

Summertime Challenge at Getting Cricky -- It's always been you... :)

Happy Sunday, everyone!!  :)  I hope this morning finds you excited with the promise of TODAY...  It's the first Sunday in a while that it's been rainy and gray here in Western Pennsylvania -- Guess it might be a good day for puddle splashing, eh?  :)

Despite the rainy morning, we're CELEBRATING Summertime over at Getting Cricky today!!  Today starts our MONTH-LONG challenges!!  Woot-woot!!  You have until June 30th to create and link YOUR project (card, layout, or 3D project) celebrating SUMMERTIME!!  I can't wait to see what you make!!

I have a SNEAK PEEK of a BRAND NEW Stamp Art Set from K Andrew Designs today!!  I was so excited to have some Happy Mail delivered on Friday, that I couldn't wait to play...  And I had just the Summertime Celebration project that I wanted to make!! :)
You see, there's something about the daisies blooming that REALLY makes me feel like Summer is on it's way...  Even with the 80 degree temperatures we've had, the sunny days, and the cookouts, nothing says Summer like the daisies in bloom!!  And, since daisies are my very most favorite flower, when a patch of daisies popped up in my flower garden...  Well, I knew that I wanted some inside the house too!!  So I set about to make a homemade vase for my daisies from an upcycled Jones soda bottle with a little gift card to go along with it...  :)
Kristal recently created another new stamp set that is sure to be a FAVORITE!!  I am fortunate enough to give you this sneaky-peek at one of the sentiments found on the "Beautiful Thoughts" Stamp Art Set -- "It's always been you"...  Isn't that just beautiful???  Who wouldn't LOVE to receive a beautiful bouquet of daisies with an attached card like that?  I even got to try out some of the NEW TWINE available at K Andrew Designs!!  Let me tell ya, this twine is thick and lush and WONDERFUL!!  I can't wait to try new ways to use it!!  :)
To create the bottle wrap for my Daisy Vase, I embossed a 4"x9" strip of yellow cardstock with a Sizzix embossing folder (I think it's called "Daisy Vine", but don't quote me on that).  After embossing, I used white chalking ink to highlight the daisies and green ink to highlight the vines.  I added yellow Kaiser Craft gems to the centers of the flowers, then added the yellow cardstock to a 4.25"x9" strip of white cardstock before wrapping it around the bottle and adhering it securely to the bottle (I recommend the extra sticky red tape for this if you don't want your label to pop off!!)...  My final touch was adding the twine...  And I LOVE it!!  :)  Even The-Snickers-Cat loved it...
As I waited for a moment when it wasn't pouring down rain to go outside and grab some pictures, The-Snickers-Cat decided she'd take a break from her difficult day of napping to stop and smell the daisies...  I just happened to catch a quick shot of her before she moved back to her perch on the window sill.  Of course, she gave her stamp of approval by not eating the flowers.  ;)
My little 3"x3" gift card enclosure uses the same embossing folder and ink techniques as the bottle...  I added a white scalloped circle punch and yellow circle punch (popped up with foam tape) stamped with the sentiment in SU!'s "Green Galore" ink...  Three little gems and a length of twine gently tied around the front of the card made this a quick and simple addition for my bouquet of flowers...

Are you ready to check out the BRAND NEW "Beautiful Thoughts" Stamp Art Set???  As of TODAY, it is in the K Andrew Designs store available for Pre-Order with a ship date of June 20th (or earlier)!!  Click on the preview to reserve YOURS today!!  :)

K Andrew Designs

So..... Go get creative and link up a Summertime project for the challenge at Getting Cricky -- I'll be waiting to see what ya make!!  :)

Until next time,

Friday, June 1, 2012

We're Off To See the Wizard Blog Hop... Or perhaps return to Kansas, Toto!! :)

Welcome to the "We're Off To See the Wizard Blog Hop"!!

*** My sincere apologies for the late posting...  I've updated the links below so that you can do a direct visit to each of the other participants' posts -- There are some really adorable projects, and I'd hate for you to miss them!!  :)

We're off to see the Wizard, and I'm so glad you made it down the Yellow Brick Road!! :) If you've arrived here from Tami, then you're not lost in the forest -- You're in the perfect spot!! :) But if you've dropped in from a spinning house, woken up from a field of flowers, or perhaps just popped over from your email or dashboard, then be sure to CLICK HERE and begin at the beginning with Lynne!!

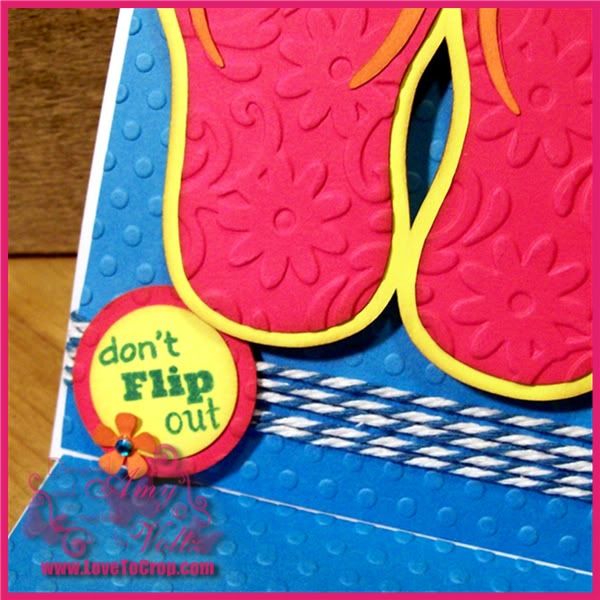
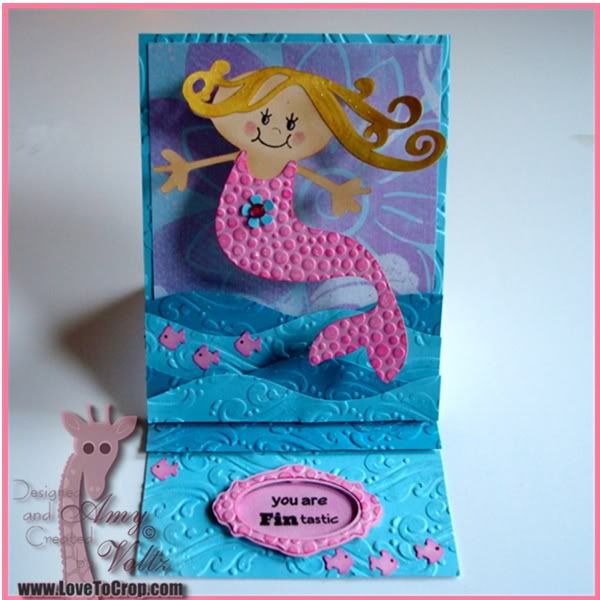
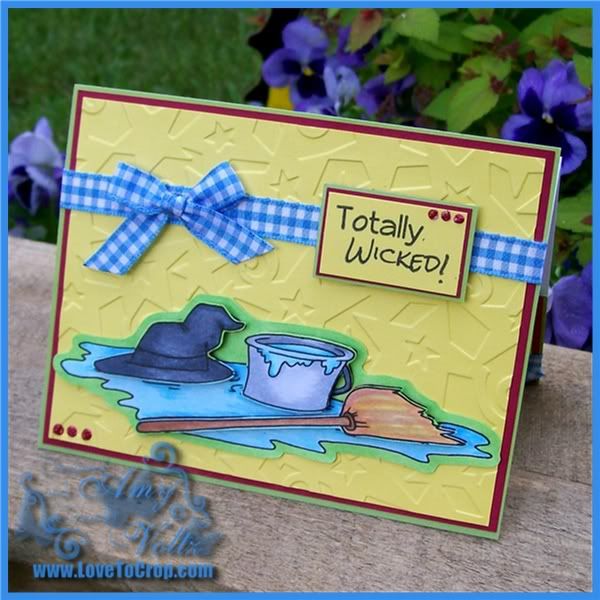
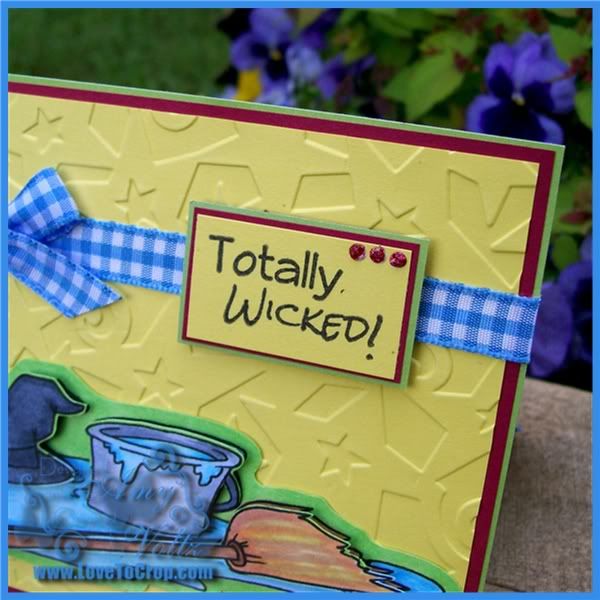
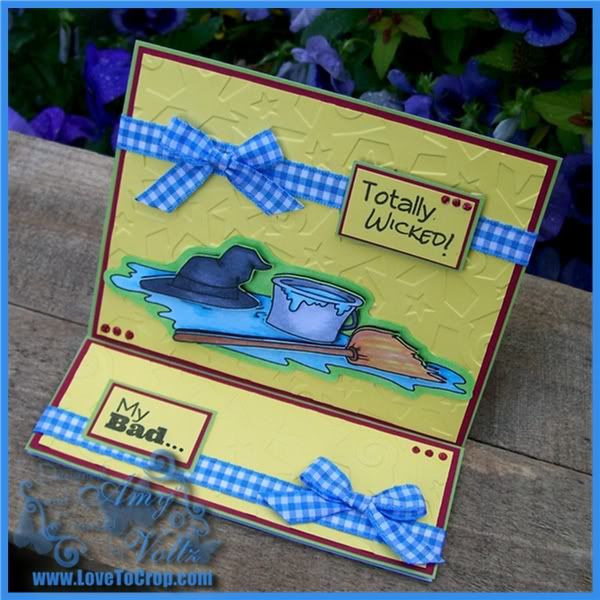
For the hop today I'd like to share a sorta silly easel card that I made...
I just love this "melted witch" image from Dustin Pike...  It kinda makes me GIGGLE!!  I colored two of the same image with my Copic markers so that I could fussy cut each element to add some dimension with foam tape.
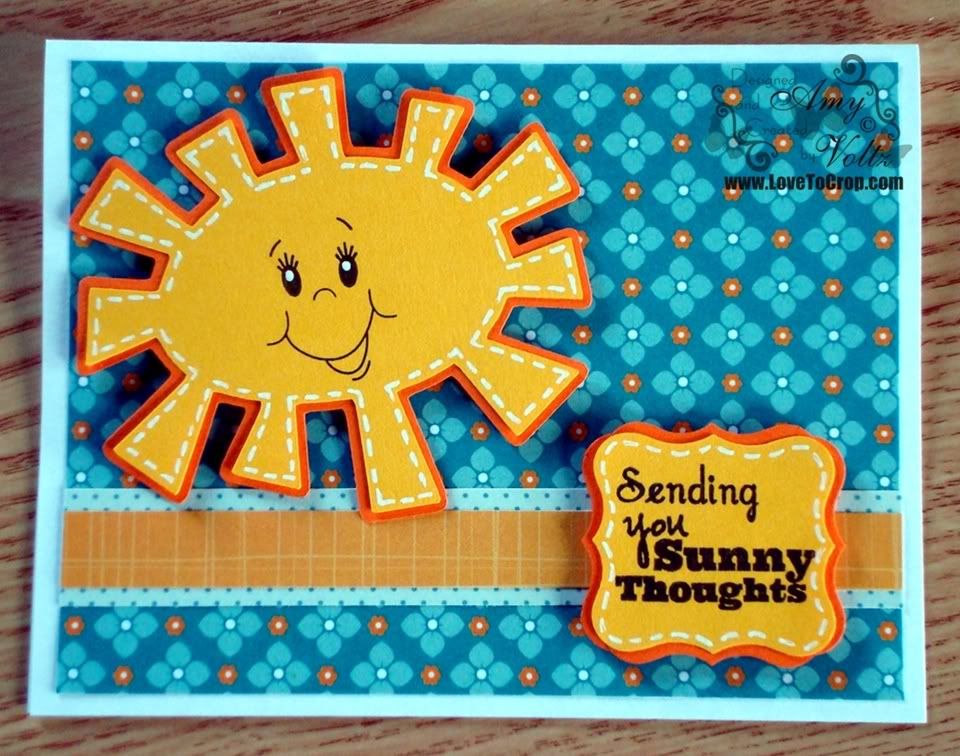
I embossed the yellow background with my Sizzix "Stars and Swirls" embossing folder before mounting it on a red layer and green layer...  The blue gingham ribbon reminded me of Dorothy's dress, and the red Stickles made me think shoes -- I often wonder if I could cover a pair of my own shoes with red Stickles since I can't seem to find any Dorothy shoes in my own size...  Sigh...  Oh, to be four again and have little feet that fit in sparkle shoes... ;)
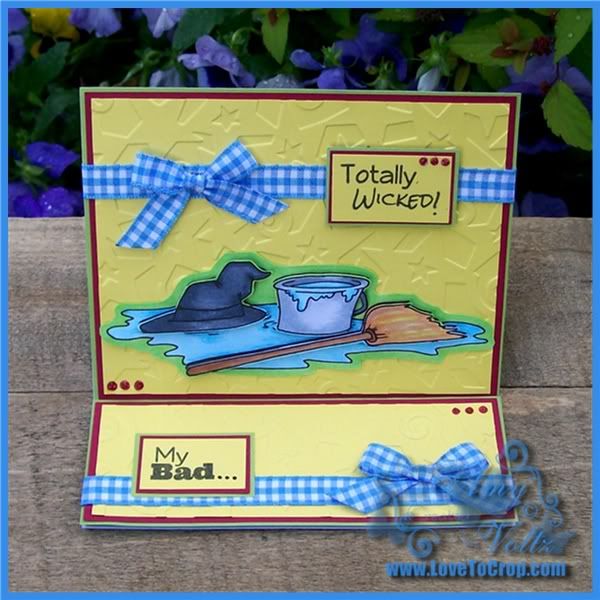
Truth be told, I was having a bit of a "Totally Wicked!" day myself...  I was a wee bit cranky...  Errr, "irritable" as it was put to me.  If my friend, 
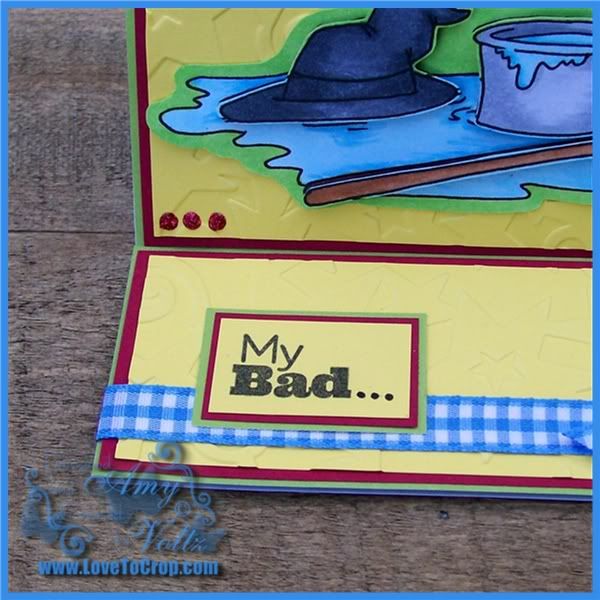
Tami B, is reading this, she will NEVER believe it (since she thinks that I throw open the windows to sing with the birds each morning just as Snow White would do...  However, we're somewhere over the rainbow today, and Snow White is nowhere to be found, so I've apparently channeled the Wicked Witch...  But I digress...)!!  Anywhooooo, I thought maybe an apology was in order for my "Totally Wicked!" behavior, so here ya go...  "My Bad..."  ;)  Maybe next time it won't take a deluge of water to set me straight, right???  :)
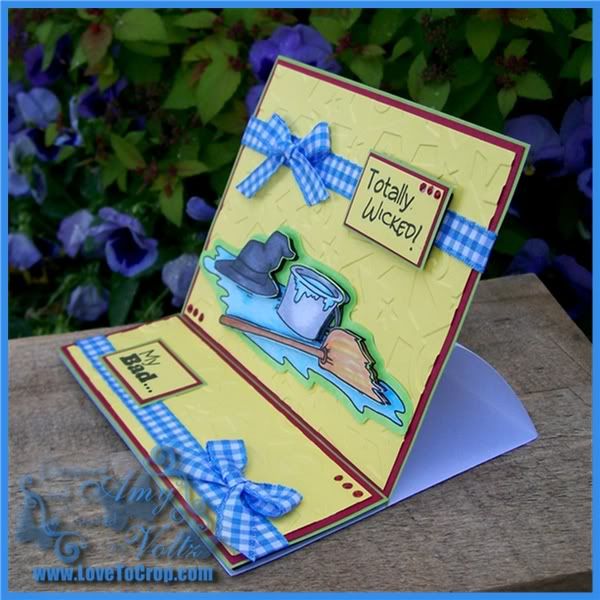
For those of you who stuck with me through that story, let's get back to the details...  If I'm going to add a sentiment to the inside of the card (instead of leaving it blank), then I often like to make the card an easel card.  This style of card is ridiculously simple to make as long as you remember to apply adhesive to only the BOTTOM HALF of your card front (ask me how I know).  There are tons of videos on Youtube demonstrating this fold, but if you want my "quick" version...  Score your card at 2" and 4.25".  The score at 4.25" will be your (regular) center fold on your A2 base (5.5"x8.25" becomes a 5.5"x4.25" card) and the score at 2" will become your easel fold.  Again, remember to attach your card front to ONLY the 2" from the edge to the first scoreline...
When you add the inside card layer, you'll want to add a bit of dimension (pop dots or foam tape) so that the card front can rest behind that little edge...  Voila!!  Easel card, quick and easy!!  :)
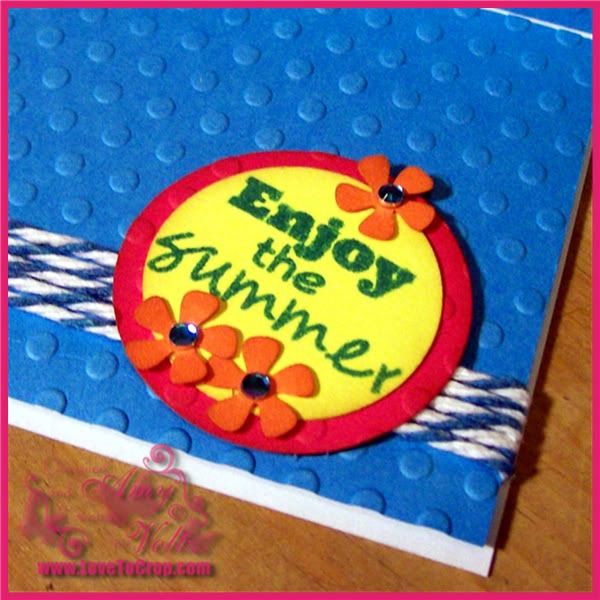
The AWESOME sentiments for my card are from the BRAND NEW "Guy Talk" Stamp Art Set from K Andrew Designs...  This great mix-n-match set is chock full of really gnarly sayings perfect for boys and guys (and Wicked Witches apparently)...  You can make this set YOURS by CLICKING HERE...
I hope you've enjoyed my card today!!  I have a few little goodies for one lucky person who leaves a comment on this post...  Come back and let me know that you've visited everyone else too (remember the links below allow you to hop directly to each participant's post!), and you'll have an extra chance to win PLUS I'll throw in even MORE goodies if you're the WINNER!!  :)

Now it's time for you to skip off down the Yellow Brick Road to one of my bloggie-land-besties... Rhonda...

And just in case the forest isn't cooperating (or the flying monkeys carry off a link), here's a list of the entire hop...  *** All of these links are updated to take you directly to each hop stop!! ***

Amy :) You are HERE now!! :)
Rhonda  Go here NEXT!!


Photobucket


Until next time,
 
Blogging tips