Here for a Hop or GIVEAWAY??? Use these QUICK LINKS to find the right spot fast!! :)

Subscribe via email

Enter your email address:

Delivered by FeedBurner

Monday, May 30, 2011

Happy Memorial Day -- Remembering those who serve and have served...

Happy Memorial Day, my dear friends...  I hope that you are enjoying wonderful weather and spending time with those you love.  I have a quick card I'd like to post for you.  I originally created it for the Operation Write Home Blog Hop, but then realized I was only supposed to post one card...  If you haven't had the opportunity to visit the blogs participating in the OWH Hop, I hope you'll take a few minutes and visit at least a few...  There are more than 130 blogs in all, but I found a lot of inspiration along the way. :)  The wonderful OWH staff has been kind enough to create a post with links to ALL of the cards in one spot!!  Please CLICK HERE to view them all (you can then click on the individual thumbnails for more details)...
This was a fun card to create...  I used my Gypsy to line up the alphabet letters (Learning Curve Cricut Cartridge) within the 4"x5.25" blue rectangle (leaving an open space where the letter 'U' would be).  Using a red card base, I layered 1/4" white strips across the front of the card to create the red and white stripes.  I distressed the card with SU!'s Creamy Caramel ink and added a small heart punch with a tiny star punch (this has a pop dot behind it for dimension).
I added a liner to the inside of the card, welded the word "missing" with the Songbird Cricut Cartridge, and paper-pieced some stars on the blue 1.5" "U" and across the bottom of the card.
If you do not have a Cricut to cut the letters, you could easily substitute alphabet stickers or even computer-generate the front of the card.  I am thinking about creating a digital image similar to my card front -- If you are interested in receiving the file, please leave me a comment with your request and your email address...  This would be an image you could print in color, print and color, or even print on a photo printer to add to the front of your card base.
As I sit here in the peace and quiet and reflect on what an important day today is, I am reminded that there are so many who are missing their loved ones...  Either because they are stationed away for active duty or because they haven given the ultimate sacrifice.  I ask that you would take a few moments to view this touching video and please remember those who have given so much for you and I...


*If you cannot see the video above, or if you prefer to watch it on YouTube, please CLICK HERE*


If you are not familiar with Operation Write Home, I hope you will take a moment to visit their site and read more about the amazing things they do...  The quick version is that they send blank handmade cards to our nation's armed forces so that they have beautiful cards to write home to their loved ones...  It is an incredible program.  Please take a moment to visit them and see how you might be able to join in on this great cause.

Thank you so much for joining me today.  Wishing you a happy and blessed Memorial Day!  Until next time,

Sunday, May 29, 2011

Simply Sunday Challenge at Getting Cricky: Pennants and Banners

Woot-Woot!!  Happy Sunday, everyone!!  Guess what Sunday means?  It's time for a NEW challenge at Getting Cricky with K Andrew!!  I sure hope you will pop on over there and enter the challenge (be sure to become a follower there and enjoy her super-motivating posts!)...  This week the theme is 'Pennants and Banners' -- We'd love to see your project (card, layout, altered art, etc.) using a pennant, a banner, or both!! :)  The challenge starts NOW and ends on Saturday, June 4th at midnight...
My project for this challenge is a 12x12 layout (I did create a second page for this layout, but I will post that later)...  I'd like to take a few moments and share with you the inspiration behind my layout...  Many of you know that I like to mull over the challenges to really get an idea of what I want to create -- Sometimes the picture in mind comes very quickly, while other times it takes a while for me to 'see' what I want to do...  This week, I had a little help from my wonderful mom who suggested a patriotic-themed layout that could be used for a Memorial Day picnic (thanks, Mom!).

Memorial Day is an important holiday to me...  Not only did my father serve in the Navy, but my cousin is career Army, and my son's best friend made us very proud when he joined the Marines...  For many people, the idea of a three-day weekend is reason enough to celebrate, but for me I believe it's important to also remember the reason behind the holiday...   I am so fortunate to have never experienced the pain of losing a loved one who has served in the military...  My heart breaks for those who have, and it is for those military families that I dedicate today's layout.  It isn't much here, but when the pictures are added from the memories shared on Memorial Day, I will only have those who so generously sacrificed to thank for my freedom...  And they are my inspiration...

 *If you cannot see the above video, or prefer to watch in on youtube, please CLICK HERE*
So tomorrow, as you meet with family and enjoy a burger on the grill, I ask that you would join me in remembering those who made this day possible...
The National Moment of Remembrance asks Americans to pause in an act of national unity for a duration of one minute at 3pm (local time). The National Moment of Remembrance does not replace traditional Memorial Day events, but rather is an act of national unity in which all Americans honor those heroes for the profound contribution they have made to securing our Nation's freedom.
Thank you for allowing me to share this with you...  I hope that your Memorial Day is filled with wonderful moments shared with the ones you love.

A few more pictures and details about my layout...
The banner was created using the DonJuan, Accent Essentials, and Celebrations Cricut Cartridges.  Those fun flowers are from Stampin Up!s new triple punches.  The stars are also an SU! punch.  My 'top note' was modified on my gypsy (sorry, I do not know the cartridge) to fit to page, then layered with the white strips (distressed and inked with SU! Creamy Caramel).
I created the journal bar with a 2" strip of white cardstock that I 'edge-punched' (tutorial to follow later). 
I hope you have enjoyed my layout today...  I can't wait to see what YOU create for the Getting Cricky Simply Sunday Challenge: Pennants and Banners!!  :)

As always, your comments are welcomed and appreciated.  Please be sure to leave me your blog address so that I can visit you too!!  :)

Until next time,

Saturday, May 28, 2011

OWH Memorial Day Weekend Blog Hop!!


Welcome to the Memorial Day Weekend Blog Hop, presented by Operation Write Home.  I would like to thank OWH for including me in this wonderful hop!!  If you arrived here from Dawn at The Chatty Stamper, then you are in the right place!!  If you popped in on this post from your dashboard or are reading this in an email, be sure to click HERE or on the banner above to go to the beginning of the hop...  There are over 100 blogs with some of the most wonderful and inspirational cards you will see!!  Here is my card...
This traditional fold A2 card features one of the owls from the Hoot 'N' Holler Cricut Cartridge, the 'Stars' Cuttlebug embossing folder, Creamy Caramel SU! ink for distressing, brown 1" grosgrain ribbon, kraft paper, ivory cardstock and Recollections Shimmer Paper in red, ivory, and blue.
Blog Candy for the Hop?  YES!!  Please become a follower and leave a comment to be eligible to win some card-making goodies.  Receive a BONUS chance when you subscribe via email (enter your email address in the box at the top of this page).

Your next stop is Misty at DeLiteful Gifts...  
Enjoy the rest of the hop!! 

Friday, May 27, 2011

Your Smile -- 12x12 Layout

The-Girl-Child will graduate high school in a few short weeks...  Wow.  I remember when my kids were so small and people would tell me how quickly they would grow up.  Sure, I believed them, but I never realized just how quickly it would really happen...
When she was little, we used to tickle her just to hear her laugh.  Actually, you never really even had to tickle her...  You just had to tell her you were going to tickle her...  She would immediately begin to giggle uncontrollably...  She had one of those infectious giggles that would make you laugh too -- until you cried from all the laughing!!  To me, she's still that chubby-cheeked little cutie with the big, brown eyes that could melt your heart in an instant...  And here she is now, a beautiful young lady, ready to take on the world!!  :) 
Ask her what her favorite color is and she'll tell you "RAINBOW!"...  Ask her what her favorite flower is and she'll say, "YES!"...  So I sure hope she likes these rainbow-colored flowers created just for her to make her SMILE!! :)
I used these same flowers on my Retirement fun(d) bank the other day in different colors...  The-Girl-Child liked that bank (and the flowers) so much, that I thought it only fair to make a layout for her with similar flowers...  These flowers are cut in 1/4" increments from 1/4" to 2", then curled forward with a bone folder, and layered together.  The leaves are hand cut (way to use my scraps!) and the gems are from Creative Charms.  I welded the font for "your Smile" on my gypsy (Songbird Cricut Cartridge).
Doesn't this picture just make you want to smile too?  It's pretty hard to be around her without finding the corners of your mouth curling up into a smile like hers...  My journal box follows the title with:  (your Smile) *makes my heart happy all day... *brightens up the room when you walk in... *reminds me why I love being your mom... *is the pot of gold at the end of the rainbow...

Thanks for joining me today!!  I hope you've enjoyed sharing this special layout with me.

I created this layout for the following challenges (please click on their buttons to visit them and play along!):
Lasting Memories
Challenge #39 -- We're Going Floral
scrapbook sundays #11
Until next time,

Wednesday, May 25, 2011

So Fortunate!! -- Fortune Cookies -- GIVEAWAY Reminder!! :)

Hello all of my creative friends!!  I just wanted to thank you -- I am so FORTUNATE to have so many fabulous followers and readers of my blog!!  It means so much to me that you stop by and send me such wonderful comments...  And so for you, tonight I have some 'calorie-free' fortune cookie favors to share with you!!  :)
I first saw paper fortune cookies like these a few years ago at a craft fair -- I loved them so much that I remember buying several of them for about $1 each...  They had lovely little tags inside that had messages of friendship so I had passed them on to a few friends hoping they would enjoy them as much as I did.  I haven't thought about those little fortune cookies much since then until just the other day when I was thinking about cute party favors.  The ones that I had purchased were made with bright patterned paper, but I wanted to try to make mine look as 'realistic' as possible...
Of course I did not keep one of those fortune cookies that I purchased so long ago for myself, so I spent some time playing with the paper (and eating a lot of REAL fortune cookies to see how they looked!!) to get the folds right...
These little favors are perfect for so many occasions -- Graduation parties, birthday parties, weddings, and showers!!  My fortune slips read: "We're so FORTUNATE to know you...  Thank you for sharing in our special event!!"
To make these darling calorie-free favors for your next celebration:
  1. Cut the circles from ivory cardstock at 4.25" (I used my George Cricut Cartridge; however, any cartridge with a plain circle will work.  I tried with smaller circles, but I couldn't get it to fold correctly).  Ink the edges of the circles with SU! Creamy Caramel ink (optional).  
  2. Start to fold each circle in half...
  3. ONLY pinch the center of the fold (so there is a crease at the center of the circle)...
  4. Lay it flat again.  
  5. Use STRONG adhesive (I used my ATG gun)... 
  6. Apply adhesive on both sides of the crease (about 2" in length of adhesive).  
  7. Bring the two edges (opposite of the way you folded in #2) of the circle towards each other and...
  8. Gently push that pinched crease in...
  9. So that it will collapse the rounded tube-like center of the circle...
  10. Continue bringing the edges back towards each other and... 
  11. Press the adhesive firmly to hold the edges together.
  12. Voila!!  You have a paper fortune cookie!!  If you would like to add a fortune to the inside, cut your fortunes into strips and add a strip inside the fold at step #7.
I hope you have enjoyed seeing my fortune cookies today -- And I hope you'll try some of these for yourself!!  Be sure to let me know if you do -- I'd love to stop over and see yours!! :)

In the meantime, I'd like to remind you that it's the FINAL WEEK to enter to win our GRAND ANNOUNCEMENT GIVEAWAY at Decorate To Celebrate!  This BRAND NEW challenge blog is dedicated to showcasing YOUR party creations!!  Whether you make treat bags, centerpieces, banners, gift bags, invitations, cupcakes, or any other party-related project, we want YOU to link up and get noticed!!  Our first official challenge begins NEXT WEDNESDAY (June 1st) at 8am with a "Father's Day Party" theme...  So celebrate Dad and Decorate To Celebrate! with us!!

Decorate To Celebrate!

Not only are we offering a one lucky follower a Surprise Gift Box filled with goodies OR a $50 Creative Memories Gift Certificate (which can be used towards the Stork's Delivery, Cheerful Seasons, or Reminisce Accents Cricut Cartridges!!), but Rhonda is also custom-making one of her BEAUTIFUL mini-albums for a lucky, lucky winner when we reach 100 followers by May 31st!!  We're SO close to the 100 -- And there are SO MANY chances to WIN!!  Be sure to stop on over now and sign up for YOUR chance(s) in the drawing!!  :)

Thanks so much for joining me today!!  Until next time...

Tuesday, May 24, 2011

Celebrate The Occasion Challenge #15 -- Retirement Fund Bank (donations welcome)...

It's Tuesday!!  You know what THAT means, don't ya???  It's TIME to Celebrate The Occasion!!  This week the theme is "Retirement"...  However you would like to celebrate a retirement, we want to see your creativity!!  Whether you create a card, layout or project, be sure to post your creation by Sunday, May 29th at 11:59pm (EST)!!  To see the rest of what my incredible Design Team Sisters created for inspiration, please CLICK HERE and visit CTO...  I can't wait to see what YOU create too!! :)
For my project, I decided to do a little recycling and reusing to create this fun and functional bank!!  I thought it would make the PERFECT addition for a Retirement Party too  -- Especially with a little tag reminding guests to donate (that's also why I'm also featuring it over at Decorate To Celebrate -- a challenge blog all about Party Decorations and Supplies!!).  :)  The-Girl-Child likes her pickles in BULK, so this jar is rather large, but I liked the smaller opening (made it tough to pull the pickles out easily, but it's perfect reconditioned as a bank!!).
I started by removing all of the labels with Goo Gone.  The factory info and expiration date were ink stamped onto the jar, but a touch of nail polish remover erased all residue and left the jar as good as new. :)  I cut two strips of 4x8 decorative cardstock and used Modge Podge to adhere the strips to the jar.  I've reused jars like this in the past (click here to see the Halloween jar I made last year) and I've found that adhering the paper strip with Modge Podge creates a much better base for adding embellishments -- plus the wrapping doesn't pop off -- which is extremely inconvenient if you're using it as a gift and it does this IN the gift bag just before the recipient pulls a plain jar out...  How embarrassing! :)

The pickle jar lid REALLY smelled like pickles so I wasn't too keen on using it for this project...  Besides, I really wanted to put a slit in the top for the money 'donations' so a solid jar lid just wasn't gonna work for me!!  So I created a paper lid...  I could bore you with the details of how I made my paper lid or I could just move on to the next step...  Of course, if you'd like to know how to create a paper lid, please do not hesitate to ask!!  I make a lot of these lids (as most jar lids do tend to smell like whatever was in the jar no matter what AND these paper lids really come in handy for all sorts of tasks!!)...
My flowers were cut using the Accent Essentials Cricut Cartridge (remember that one you got with your Expression???).  I cut a series of flowers ranging in size from 3/4" to 2 1/4" (at 1/4" increments), inked the edges, curled the edges with my bone folder, and layered them for different effects...  Keep in mind that every flower is exactly the same, just cut in another size/color and curled out or under depending on the look I was going for...  If you haven't tried creating any of these layered flowers yet, I hope you'll try some...  I often cut lots of extras so that I have quick and easy embellishments on hand to add to a card or tag. :)

My tags were distressed with ink and curled with my bone folder...  The letters are stickers -- I collected a stack of alphabet stickers before I got my Cricut...  Now my stack of alphabet stickers has been collecting dust!!  So I'm on a mission to use my stickers whenever I have the chance :)
As always, your comments and questions are welcomed and appreciated...  I'd love for you to join this week's challenge at Celebrate The Occasion...  So hop on over there and enter YOUR project (plus you get a chance to win an AWESOME Cricut Cartridge!!).

Thanks so much for joining me today...

Saturday, May 21, 2011

We Love Our Heroes Blog Hop!!

***If you are looking for the Red, White, and Blue Card Challenge, please CLICK HERE!!***

Welcome to the 'We Love Our Heroes Blog Hop'!! :)
Today is Armed Forces Day, so this is a hop to support and bring awareness to the works of Operation Write Home. You should have arrived here from the talented Sally!!  If you are one of my fabulous followers hopping over from your dashboard OR if you are reading this in an email, please CLICK HERE to go to Misty's Blog, and hop along through so that you don’t miss anything this wonderful group has to offer.

In addition to card makers making cards for service persons to send home to their families, OWH has something called ‘Hero Mail'... These cards can be ANY size (not just the usual required A2 size) and include a personal note to ‘Any Hero'...  We call them 'Heroes' (instead of just 'soldiers') because OWH ships to all branches of service. These hero cards are passed out to deployed heroes who might not get much mail or are just passed around to enjoy news from home.   I would love for you to stop over at OWH for more info or to get started on some hero cards of your own!!

Thank you to all of our Heroes -- past and present, as well as those who serve on the Homefront!  I'd like to share three of the Hero Cards I've made to say 'Thank You' for the generous sacrifices made by the brave men and women of our Armed Forces...
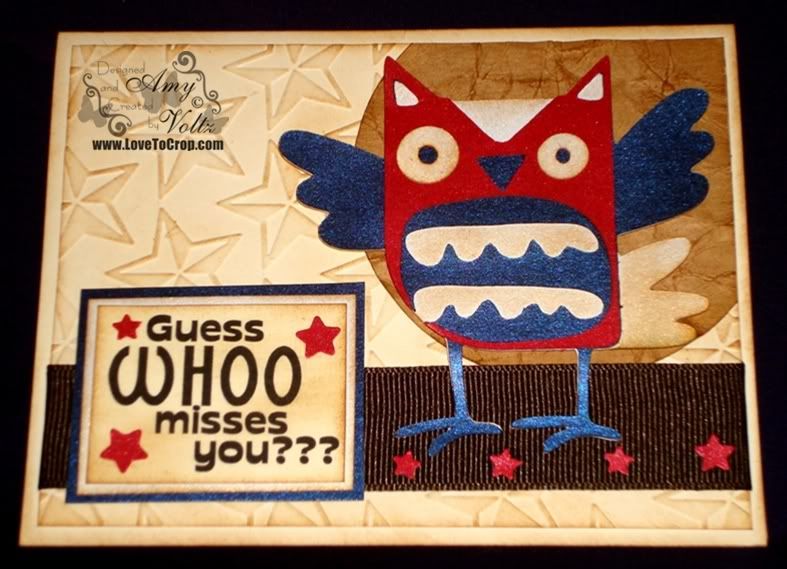
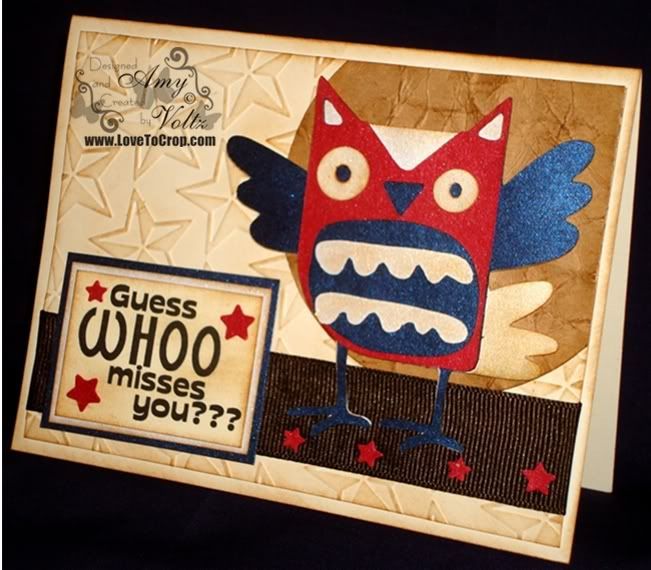
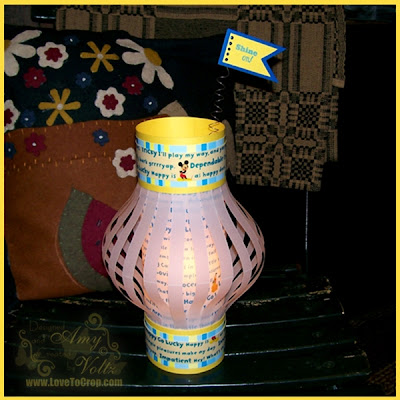
This card was made using the A Child's Year Cricut Cartridge...  Since glitter is a big no-no (but I like a little sparkle), I especially love using this 'shimmer' paper that is 100% 'Hero-Safe'... 
My sentiment ('thank you so very much') is a StampinUp! stamp, and I used my Tim Holtz tiny attacher to staple the sentiment to the card front.
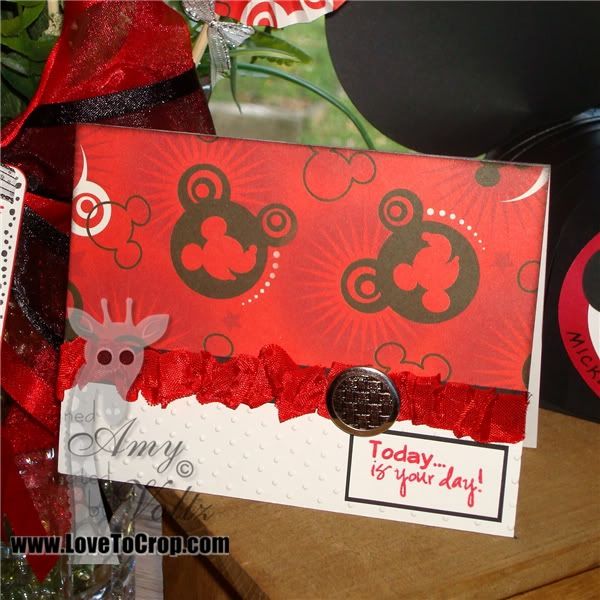
My second card was created with the Create A Critter (for the giraffe) and Stand and Salute (for the humvee) Cricut Cartridges.  The clouds were punched with my Creative Memories Scallop Circle Maker and then embossed with my 'entangled' Couture Creations embossing folder (a gift from my awesome Aussie friend, Carlene!).  The road was embossed with my 'tiny bubbles' Cuttlebug embossing folder.
I really, really, really love giraffes, so it's always fun to create cards with giraffes!!  This guy is happy to be a *USA HERO*!!  And I'm happy to have a FUN card to say thank you, thank you, THANK YOU to a real hero...
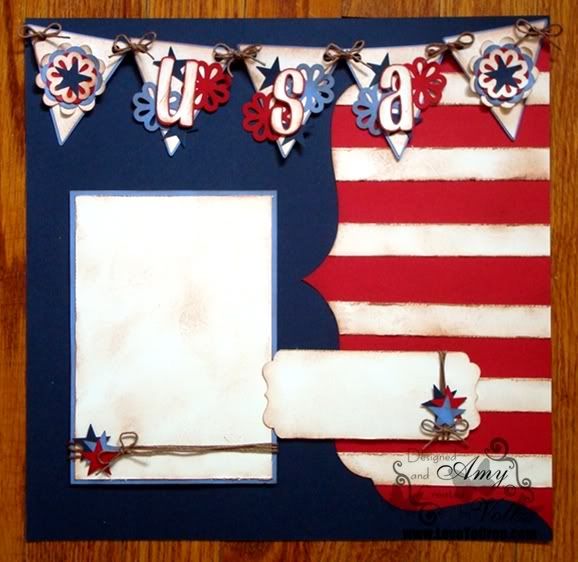
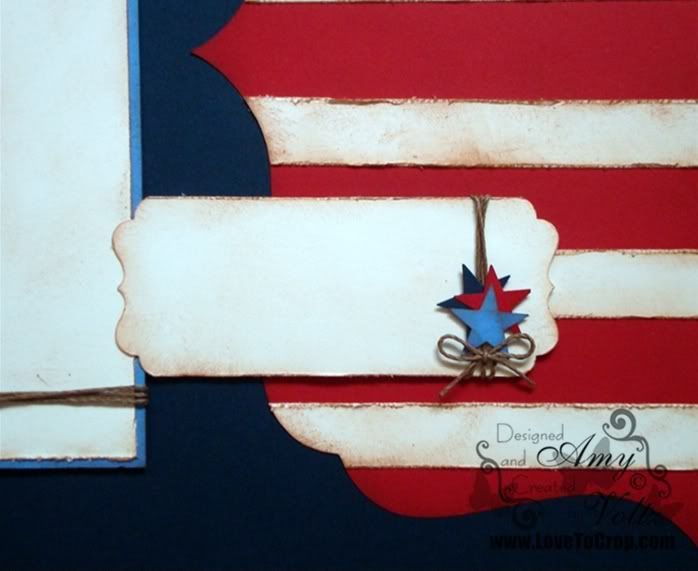
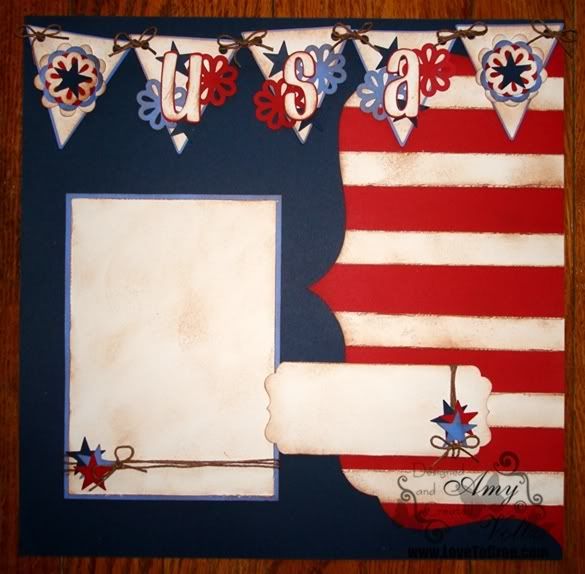
Not only am I super-in-love with the shimmer paper (this card is TOTALLY shimmered out!!), but I'm also super-in-love with the fireworks and phrases found on the Stand and Salute Cricut Cartridge!!  They always make me feel like celebrating, they are super easy to cut out, and they look great no matter what!! :)
I added some dot, dot, dots with my silver metallic Creative Memories pen...  And to finish off the sentiment on the front ('Land of the Free'), the inside says...  "because YOU are brave!!" 

Thanks so much for taking the time to look at my cards.  I know these cards are a small gesture compared to the daily sacrifices of our Armed Forces...  I truly feel tremendous gratitude to the men and women who choose to face such intense circumstances so that I can enjoy such priceless freedom...

Your next stop is Anita...  But before you go, please be sure to leave a comment 
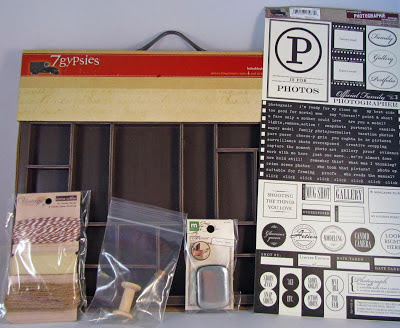
HERE to be eligible for my Blog Hop Candy!!  I have a selection of card-making supplies (perfect for some 'Any Hero' cards!!) to send to one lucky person...  I love giving extra chances in my drawings -- If ya only want one chance, you only need to leave one comment...  If ya like extra chances, here's how to get them all:
  • Leave one extra comment if you are a follower or become a follower (you do not have to be a follower to win)...
  • Leave one extra comment if you 'like' LoveToCrop! on Facebook (CLICK HERE to 'like' it now)...
  • Leave one extra comment if you subscribe via email (enter and confirm email at the top of this page)...
  • Leave one extra comment if you join my Red, White, and Blue Hero Card Challenge (CLICK HERE to join the challenge)...
  • Leave one extra comment WITH A NOTE TO ANY HERO (I will include your note in a card to be sent to OWH)...

PLEASE be sure to leave your email address in safe scrapbookingwithamy at gmail dot com format so that I may contact you if you are the winner (otherwise, you will need to check back -- Winner will be announced on Saturday, May 28th to allow for the Red, White, and Blue Hero Card Challenge).

Now, hop on over to see what sweet Anita is showcasing for you today!!

In case you get lost along the way, the complete hop list is below.

Amy <<< YOU ARE HERE!!
Anita <<< GO HERE NEXT!!

Wednesday, May 18, 2011

Card Carnival Blog Hop Winner!! Next Hop and an Upcoming Challenge!!

I would like to thank everyone who stopped by during the Card Carnival Blog Hop this past weekend!!  I really enjoyed all of your wonderful comments -- It means so much to me that you take the time to visit and encourage me!!  Thank you!!

So there's a WINNER to announce now...  Random.org selected comment #63...  With my handy-dandy comment counter, it was quick and easy to see that my winner is:

thekolbes said...   I am already a follower. Thanks so much for the awesome chance to win, Trish

Congratulations, Trish!!  :)  Since you left me your email address, I will be emailing you soon!! :)


Thanks again to everyone for making the Card Carnival Blog Hop such a FUN event!!  Be sure to mark your calendars for the NEXT Blog Hop I am participating in (this Saturday) where you'll have MORE chances to WIN some AWESOME Blog Candy (hint, hint...  Want a head start on an extra chance?  Create a Red, White, and Blue Thank You Card for one of our deployed heroes...  I'll have a Linky List this Saturday for you to show off your card!!  Hope to see ya then!!)...


Armed Forces Day Blog Hop  
(clicking on the button will take you to the Host of the Hop -- Misty!!)


Info for the upcoming Hero Card Challenge:
  • The Linky List for my bonus Blog Hop challenge will be up on Saturday 5/21/11 at 9am EST and will run until Friday 5/27/11 at 11:59pm EST.  
  • Blog Hop starts at 10am and will be in a separate post.  
  • Feel free to link as many NEW Red, White, and Blue Hero Thank You Cards for the challenge as you like; HOWEVER, I do ask that you link your project back to my blog so that others can play along too!!  
  • All eligible entries will receive a BONUS chance in the Blog Hop Candy drawing.
  • A separate drawing will also be held for entries only (so one entry is guaranteed to win a prize).
  • Have FUN!!  I can't wait to see what you create!!
Until next time,

Sunday, May 15, 2011

Card Carnival Blog Hop!!

Welcome to our Card Carnival Blog Hop!  You should have arrived here from the wild and wonderful Kathie at Snippets & Cricuts!!  If you are one of my fabulous followers jumping in from your dashboard or email OR if you just happened to stumble upon this hop, please be sure to go back to Sherry's blog, so you don't miss any of the wonderful projects we have to share.
I am so honored that Sherry asked me to be a part of her hop...  It means so much to me that she finds my talent worth sharing -- THANK YOU, Sherry!! :)  Sherry asked us to create a 'shaped' card (or three) for her card carnival...  I am always amazed at the wonderfully creative cards out there made in all kinds of shapes...  I took my inspiration from some of the incredibly talented card-makers' blogs I've had the pleasure of visiting over the last year...  I hope you like them!!  If you would like detailed instructions for any of my cards, please feel free to email me at scrapbookingwithamy at gmail dot com.  All of these cards will fit into an A2 envelope...
Snail card created using Cheerful Seasons Cricut Cartridge
USA Fireworks card created using Stand and Salute Cricut Cartridge
"Dad" card made using A Child's Year Cricut Cartridge (including font)
Thank you for stopping by my blog, your next stop is the sweet and talented ANITA...  But before you go, be sure to leave a comment to be entered in my Blog-Hop-Candy-Giveaway...

I have a selection of card-making goodies to send to one lucky winner!!  You do not have to be a follower to win; however, you can receive an EXTRA chance at winning my Blog-Hop-Candy when you ARE a follower (please leave me a second comment letting me know that you are a current or NEW follower)!! :)

If you want ANOTHER EXTRA chance, please 'LIKE' my facebook page (click HERE or the facebook badge on my right sidebar) -- Be sure to leave a comment letting me know that you've done this for your EXTRA chance)!!  Please be sure to leave your email address (in safe scrapbookingwithamy at gmail dot com format) so that I can contact you if your comment is selected via Random.org!!

***Blog-Hop-Candy entries will remain OPEN until 11:59pm (EST) on TUESDAY, May 17th!!  Winner will be drawn and announced on Wednesday, May 18th!!***

Below is the list of participants in the Card Carnival Blog Hop (in case you get side-tracked along the way and need to go back or visit again!)...


Amy  <<<< YOU ARE HERE!!
Anita   <<<< GO HERE NEXT!!

Saturday, May 14, 2011

Mother's Day Blog Hop WINNERS ANNOUNCED!!

As many of you are aware, Blogger hiccuped this week...  Because of this hiccup, I was not able to access my blog for about 36 (very long) hours...  When it came back up, I was knee-deep in track meets and unable to do my Blog Hop drawing right away -- ESPECIALLY when I realized that there were some comments missing from posts!!  YIKES!!  This sent me into the depths of my email to check, double-check, and re-check that everyone who SHOULD be in the drawing was actually IN the drawing...

So I sincerely apologize for the delay in posting this...  I have now confirmed the entries (all 116 of them) and have drawn my Mother's-Day-Blog-Hop-Candy WINNER....  Drum-roll please.....


Now, because I realize that some of you have checked back throughout the week to see if the winner had been posted, I thought it might be nice to draw a few extra names to receive a little bonus just to say 'Thanks!'...  It isn't much, but it's a little something-something to express my gratitude...  If you see your name below, please email me (scrapbookingwithamy at gmail dot com) with your mailing address so that I can send your little bonus prize out this week...

Thank you so much for your patience -- I'm looking forward to sending out some goodies to these WINNERS!! :)  Please contact me (or reply to my contact) within 7 days to claim your prize...  After 7 days, I will reluctantly draw a new winner...

For those of you that didn't win this time, I'm in several hops over the next few weeks -- I will offer blog candy for EACH hop, so please come back and enter to win!!  Also, if you haven't seen my "Pay It Forward" post yet, there were still TWO spots open for that as well -- I'd love for you to join in on that fun!! :)

Until next time,

Wednesday, May 11, 2011

Pay It Forward in 2011...

 ***If you are here for the Mother's Day Blog Hop (Day 4), please scroll down or CLICK HERE***

Deborah over at Scrapping Mamma posted this wonderful "Pay It Forward" post on her blog tonight...  I think it's a WONDERFUL idea and I couldn't wait to participate and pass it on!!  :)  **Her 5 spots are full, but I also visited the previous two Pay It Forward participants -- Alison and Heather -- who each had at least one spot left when I wrote this, so please sign up with them if my spots fill up quickly too :)

"Pay It Forward" is the idea of blessing someone with a random act of kindness without expecting anything in return. It’s passing on a kindness, hoping that your recipients will do the same, and forming a never-ending chain of goodwill. But it isn’t only kindness, it is also a means to connect and share instead of just keeping it to ourselves.

"I promise to send an original creation to the (1st) 5 people who leave a comment here. They must, in turn, post this on there blog, and send something they make to the 1st 5 people who comment on their status."

Here's what you need to do:
1. Leave a comment on this post. I will send a handmade gift to the first 5 people who comment.
2. Create a post on your blog offering the same.
3. Send a handmade item to your first 5 people who comment.
4. It must be sent to your 5 people sometime in 2011.
Please do not sign up unless you are fully committed to making your 5 items!

**If you are one of the first 5 people to leave a comment on this post, PLEASE email me your mailing address (scrapbookingwithamy at gmail dot com)...  It will also be helpful if you put "PAY IT FORWARD" in the subject line.  Thanks so much!!  I'm excited to Pay It Forward!! :)

Until next time,

Mother's Day Blog Hop -- Day 4!! Take a stroll down Memory Lane...

Welcome back to Day FOUR (the very last day -- boo hoo!!) of the Mother's Day Blog Hop!!  If you've arrived from my AWESOME Aussie friend Carlene and her super-fun blog, then you have reached the end of the end of the hop!!  If you're one of my fabulous followers hopping directly here or reading this in an email update, then you'll definitely want to CLICK HERE and start at the beginning of the hop to see all the wonderful ways some of my crafty friends are celebrating moms...   

For my post today, I'd like to take a stroll down memory lane...  All of these projects have been previously posted on my blog and were either gifts for MY mom or a special friend who is a mom (and just needed celebrated), so you will find a link for each project under the picture -- To see the details for each project, please click on the link...

Now, it doesn't have to be Mother's Day to celebrate mom, so why not make mom (or someone who's been like a mom to you or someone who just IS a mom) something special on any day of the year -- After all, she's probably packed a lunch or two, made a few dinners, done some laundry, played chauffeur to games and practices, stayed up late helping with a school project, shopped for school clothes, wiped some tears, kissed some boo-boos...  And it's only 10am!!  :)

Let's face it -- being a mom is one of the most challenging, yet extremely rewarding, positions in the work force...  And even though the 'thank you' moments may be few and far between, the joy of seeing a child smile or laugh, the wonderful feeling of little arms wrapped around your neck, the little fingers that intertwine with yours, and the sweet kisses make it all worth it...  In what seems like a split second, those little packages of joy are all grown up and chasing their own dreams, making their own paths...  So if you have chocolate cookie fingerprints smeared on your windows or toys strewn about the floor, take a moment to breathe it all in and enjoy it... 

Maybe you'd like to treat your mom to a designer purse...
that explodes into a fun little album of memories!!  (see the original post HERE)

Or maybe she'd enjoy a bouquet of flowers...
that lasts longer than the FTD ones... (see the original post HERE)

Perhaps you could document her favorite childhood memories...
and the stories that still delight you.  (see the original post HERE)

You could even make a layout for her favorite pet...
even if you're not his favorite person :)  (see the original post HERE)

Cuz when it comes right down to it...
I really do {heart} my mummy :)   (see the original post HERE)

Thank you sooooooo much for spending some time with me this week...  If you have missed any of the previous three days of the hop, there's still time to visit each post and leave a comment to be eligible for my Blog Hop Candy...  Remember, if you comment on ALL FOUR posts, your chances in the drawing will be QUADRUPLED (so a minimum of 16 chances plus extras x4 if you did the 'extra' things from Day 1)...  All 'entries' are due by 11:59pm on Wednesday, May 11th).  Please remember to leave your email address OR check back on the 12th for the winner(s) announcement...

As a SPECIAL BONUS offer...  If you leave a comment on each of the FOUR Mother's Day Blog Hop posts PLUS leave a comment on the original posts of the five projects above, you will AUTOMATICALLY win a RAK from me (a RAK is a small thank you gift to show my appreciation for your time and comments).  Once you have posted on all nine posts, send me an email with your address to scrapbookingwithamy at gmail dot com (you'll need to remove the spaces and replace the at with @ and the dot with .).  Please put RAK in the subject line to help get your gift out more quickly...  To help YOU out, here are links to all nine posts:

Thanks again for joining me in this SUPER FUN hop -- If you missed any of the fun along the way, here is the line-up for all of the creative participants in this four-day hop -- simply click on a name to go directly to that blog!!


Made By FancyWithNancy.com


Amy  THAT'S ME!!  You are HERE!! :)

Tuesday, May 10, 2011

Mother's Day Blog Hop -- Day 3!! All about Mom Layout, Walk in my Garden, MPS Challenge #4

Welcome back to Day THREE of the Mother's Day Blog Hop!!  If you've arrived from Carlene's blog, then you have reached the final destination for the hop today!!  If you're one of my fabulous followers hopping directly here or reading this in an email update, then you'll definitely want to CLICK HERE and start at the beginning of the hop to see all the wonderful ways some of my crafty friends are celebrating moms...  
My project for today is this layout made with my Super-Mom in mind...  As I mentioned yesterday, she has an absolutely beautiful garden...  These flowers make me think of some of the flowers I might see in her garden.

I hadn't planned on posting a project for the Mother's Day Hop today, but I was trying to finish the challenges over at My Pink Stamper...  And Challenge #4 was to create a project with a Mother's Day theme.  Additionally, over at Cooking With Cricut they are having Challenge #28 '3 Flowers and Purple - With Mother's Day in mind', at More Than Favors the Wacky Wednesday Challenge #37 is to make a project with a Mother's Day Theme, and the Paper Cutz Challenge #90 is to create a project Mother's Day using any colors...  What perfect challenges for my post today!! :)
I love these daisy flowers found on the Walk in my Garden Cricut Cartridge...  With a little big of dimension and some bling in the center (those gems are actually clear, not sure why they kept coming out golden in the pictures -- guess they were reflecting too much light), the daisies can be so versatile.  I also used the 'boxy' five petal blossom as filler under the daisies...
The 'MOM' was cut using both the base and shadow features on the DonJuan Cricut Cartridge...  This is such a wonderful cartridge -- If you haven't added this one to your collection, you really might want to consider it -- I've fallen in love with the 'stitched' feature that I showed you in Day 1's Mother's Day Blog Hop post...
Can you believe I had that great big piece of decorative paper in my scrap stash???  It had about a half inch trimmed from one side of it, so I couldn't use it as the base of my page...  But it was perfect for the decorative frame!!  I love how wonderfully it coordinates with the purple flowers (cut from the scraps leftover after my Celebrate The Occasion Wedding layout!)...  You might also recognize that fabulous crinkle ribbon sent by my new friend, Kate at Small Bits of Paper...  The ribbon is from My Craft Spot, and I will definitely be adding some more of this to my collection -- I love it!! :)
There's ONE more day of celebrating moms in this Mother's Day Blog Hop -- I hope you'll join me tomorrow for my final project made especially for Mom!!  :)

In the meantime, remember to comment on this post for a chance in my Mother's Day Blog Hop Candy!!  :)
There's still time to join in on the fun from Day 1 and Day 2 of the hop...  For maximum chances in the Blog Candy giveaways, you'll want to see all of the posts...  For Day 1 of the hop (as well as the entire line-up and the details and bonus entries for the Candy), please CLICK HERE!!
For Day 2 of the hop (and more chances to win the Candy), please CLICK HERE!!

Until next time,
 
Blogging tips