I'm baaaaack!! And I'm ready to complete some challenges!! Woot-woot!! Have ya missed me? :)
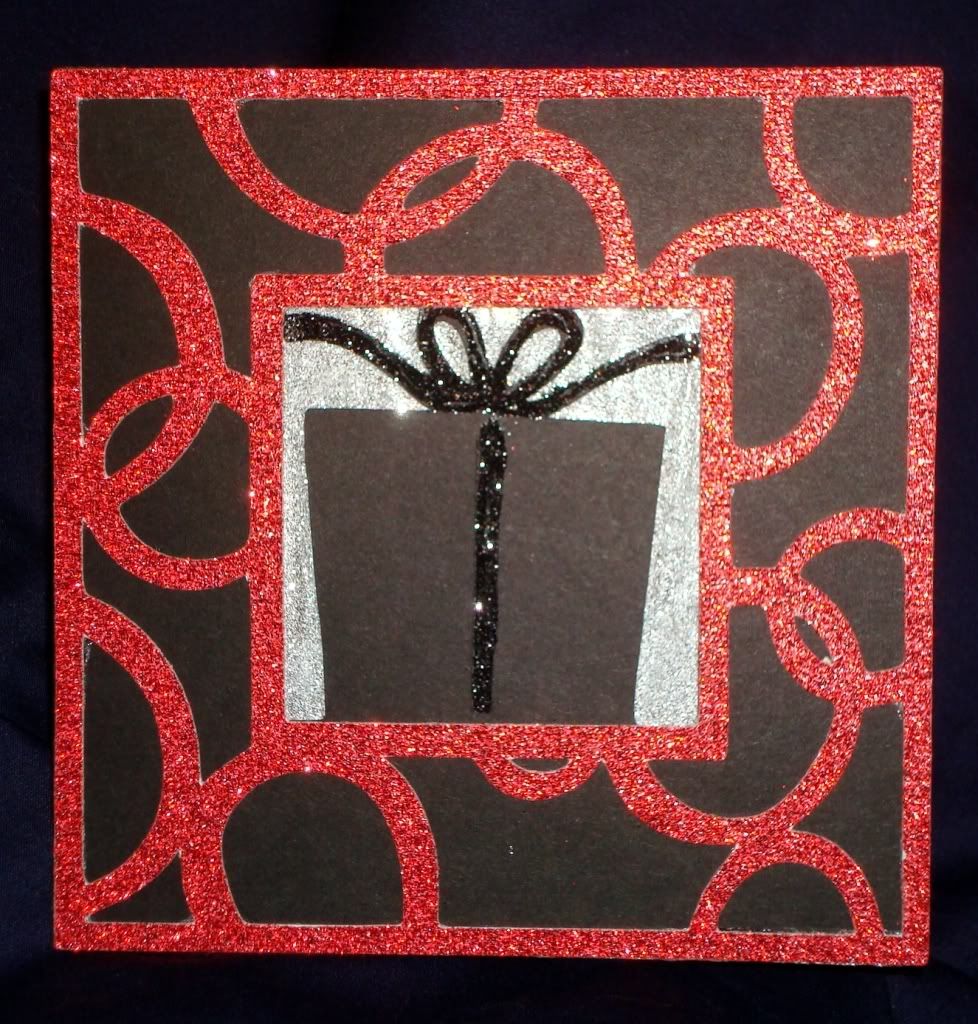
For my first project of 2011, I've created this super-simple square Birthday Card just loaded with my favorite crafting supply.... GLITTER!! I am entering this card into two challenges: The Cricut Cardz Challenge #57, which was to "make a card using any cartridges or theme you'd like, BUT using the colors red, black and white ONLY!" ...and the Cooking With Cricut Challenge #12 -- GLITTERMANIA! where they wanted to see ya glitz it up big time!!

To create this card, I used:
Stretch Your Imagination Cricut Cartridge
Black Cardstock
White Cardstock
Red American Crafts Glitter Cardstock
Shipping Tape
Stampin Up! 'Well Scripted' Stamp Set
VersaMark Stamp Pad
Martha Stewart UltraFine Glitter
Red Embossing Glitter Powder
Embossing Heat Gun
Recipe Instructions:
- To create the card base, select the 'Card' feature on your Stretch Your Imagination keypad overlay. Then select the 'Present' key and cut at 5" from black cardstock.
- Leaving the size at 5", select the 'Card Frame' feature and select the 'Present' key again (or use Repeat Last). This will cut your red glitter cardstock... Be sure to remove your blade housing and clean any glitter from the blade area after cutting the glitter cardstock. This will keep your blade rotating freely and avoid any paper tears on your next cut.
- Cut two pieces of white cardstock each measuring 4.75" square for the inside of the card (do not adhere yet).
- Open the card and tape shipping tape over the entire 'present' area (the sticky side of the tape will face out to the front of the card).
- Flip the card over so you are looking at the front and sprinkle glitter generously over the visible shipping tape... Pat gently and shake excess from card front.
- Using a precision glue pen, apply glue to the bow and ribbon area of the present on the front of the card. Sprinkle black glitter onto glue, pat gently, and shake excess off for an added sparkle effect on present area.
- Adhere red glitter card frame to front of card.
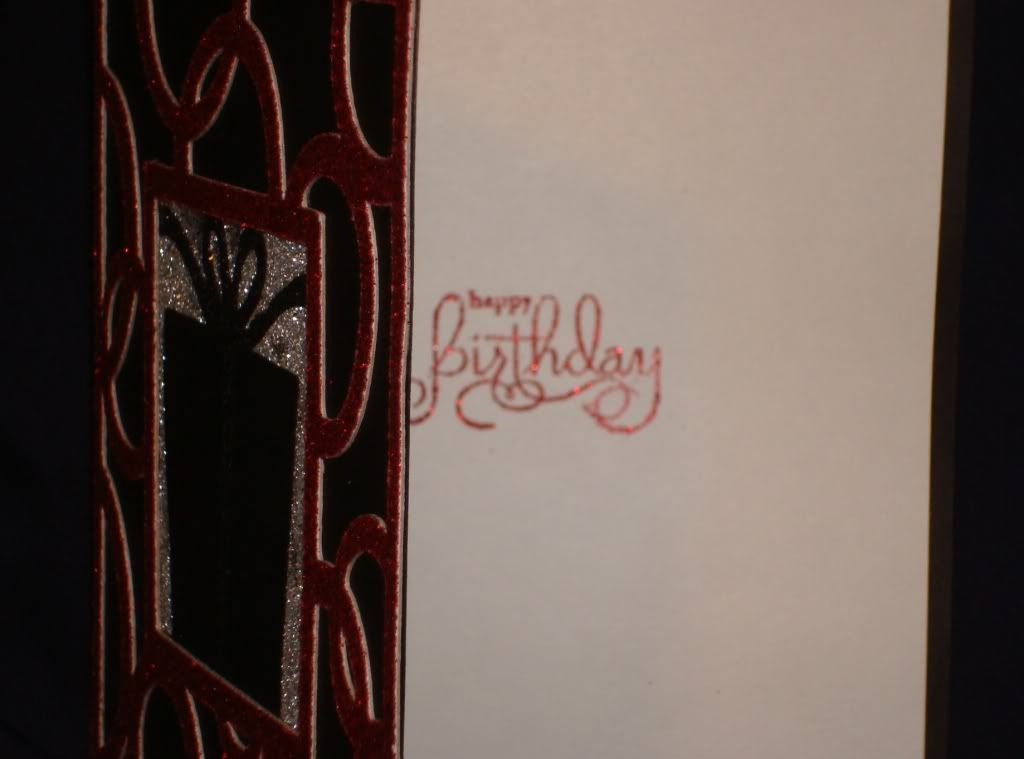
- Using VersaMark pad and 'happy birthday' stamp, stamp sentiment on one of the white cardstock squares. Sprinkle red embossing glitter onto image and shake off excess. Use heat gun to emboss image. Adhere to right inside of card.
- Adhere second white cardstock square to left inside of card (over shipping tape).
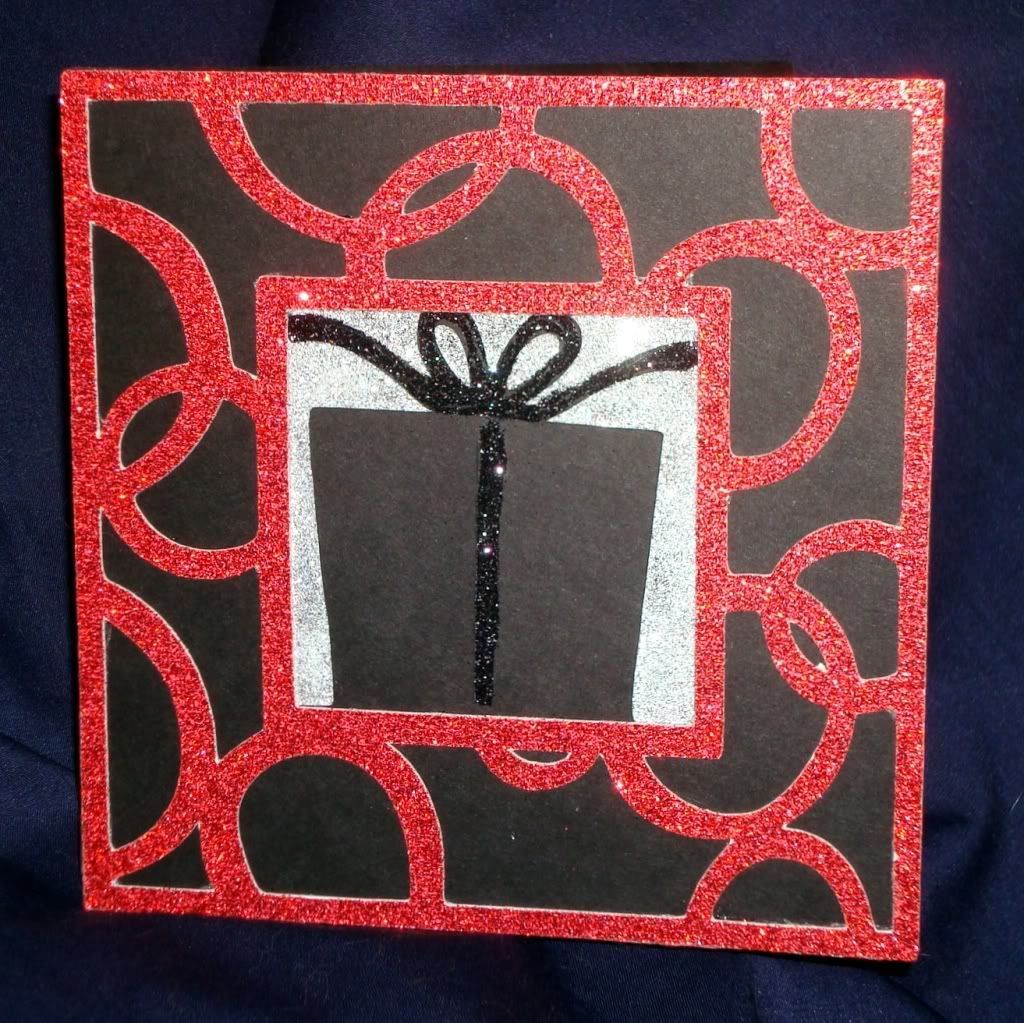
Voila! Present to the lucky recipient!!
When The-Girl-Child came into the kitchen where I was adding the last minute touches (when I decided to emboss the 'happy birthday'), she immediately told me what a beautiful card it was!! For a card that really took less than 15 minutes to cut out and create, I was tickled!! :)
I'd love to hear what YOU think of my card, so please leave a comment and let me know you were here. :)
Thanks so much for stopping by!! I hope you'll come back and see what else I'm creating in the next few days!! To see all of my current creations, please CLICK HERE!


5 comments:
How cute is this? Love red and black together! This rocks. TFS and thanks for joining us at Cooking With Cricut.
~Madison CWCDT www.funkycards.blogspot.com
What a sophisticated looking card! I love your color combinations! Thank you Amy for sharing your work with us at CWC. I am now following you and looking forward to seeing more of your beautiful work. Thanks again! Melin...CookingWithCricut.com
Great job! What a fabulously intricate and beautiful card for as simple as it was! Thanks for playing along this week with Cooking with Cricut!
Love your take on this challenge.
Thanks for playing along @ CCC.
Wow, I love your card, it's is just absolutely gorgeous, thanks so much for joining with us at CCC.
Post a Comment