Here for a Hop or GIVEAWAY??? Use these QUICK LINKS to find the right spot fast!! :)

Subscribe via email

Enter your email address:

Delivered by FeedBurner

Thursday, February 16, 2012

We're Off to See the Wizard Blog Hop -- A card, a costume, and a cackle or two!! :)

Welcome to the Wizard of Oz Blog Hop!!

I'm so glad you made it down the Yellow Brick Road to see me today!! :)  If you've arrived here from Kari, then you're not lost in the forest  -- You're in the perfect spot!! :)  But if you've dropped in from a spinning house, woken up from a field of flowers, or perhaps just popped over from your email or dashboard, then be sure to CLICK HERE and begin at the beginning so you don't miss any of the Good Fairy Goodness!! :)  Lynne has some Blog-Hop-Goodies to tell you about, so I wouldn't want you to miss those details...

For the hop today I'd like to share a fun easel card I've made....
It's a WELL known fact that I love, love, LOVE The Wizard of Oz...  I have many fond memories of watching this movie when I was a little girl -- I was always intrigued that only the part where Dorothy was "dreaming" was in color, while the rest was black and white...  Life can sometimes be like that -- Our dreams are bright and vivid, infused with COLOR, but it's easier to look at our day-to-day lives as a bit boring (or black and white)...  I guess that's why I picked this sentiment "Attitude is everything" for my card!!  Dorothy went off looking for something when what she really needed (and wanted) was right in her own backyard!! :)
So a LITTLE known fact about me and The Wizard of Oz is that I was able to play the character of Dorothy a few times in my life (I also got to play a witch a WHOLE lot, but that's a story for another day!! --insert cackle here--)...  One of my favorite roles as Dorothy was during Summer Stock Theatre while I was in high school...  If feeling like a movie star could be achieved by crowds of kiddos asking for your autograph on their Xeroxed programs, then lemme tell ya...  I felt like a movie star!!
The second time I got to "play" Dorothy wasn't for a theatre...  It was actually a sort-of mistake!!  I was invited along on a business trip to Las Vegas and we knew there would be a costume party at some point during the trip...  Rather than waiting until we got there (and risking the possibility of not finding a costume store), we decided to find costumes here at home...  I suppose I should have paid a little more attention to the hotel we were staying in before choosing  my all-time favorite character of Dorothy (complete with a "toy" Toto that really barked!!) alongside a costumed Tin Man, because when we stepped into the lobby of the MGM Grand Hotel, we found ourselves surrounded by Munchkins and following a Yellow Brick Road...  Oh dear!!  I posed for more pictures on the way to the costume party -- As all the hotel guests were sure I was put in place by the hotel management!!  It certainly was a FUN memory (and I might even choose to make that mistake again if I ever return to Las Vegas!!)...
Okay, enough of those stories...  A few details about my card...
I found these AWESOME Wizard of Oz Digi Stamps from Dustin Pike and Doodle Dragon Studios...  The set comes complete with Dorothy and Toto and the Twister seen here, as well as The Emerald City, the Tin Man, the Lion, the Scarecrow, the Wiched Witch of the East, and the Wicked Witch of the West as nothin' but a puddle... 
I printed the Twister large enough that I could use it as the background...  And speaking of that K Andrew Designs Stamp sentiment "Attitude is everything" (found on the "Positive Thoughts" Stamp Set)...  I normally print my images out at least a day in advance since I color with Watercolor Pencils and a Blender Pen (and I only have an inkjet printer)...  Giving the images time to dry or "set" into the paper keeps my images from bleeding when I get a little carried away with the blender pen. :)  Welllllllll...  I forgot to print these out early and I ruined the first set (especially since I was coloring while lounging and had insufficient light!!)...  Since I was feeling a bit lazy and didn't want to drag out my heat gun or ironing board and iron to HEAT set the image, I thought I'd just hold it near the woodstove and let it "dry" that-a-way....
... If you look closely at the Twister, you'll see the BURN marks showing through from the back of the cardstock!!  Word to the wise...  Never ever "dry" your images in front of the woodstove...  Especially when it's hot enough to boil the kettle of water on top AND when you're also distracted by an episode of "The Middle"....  Hey!!  I made the best of a bad situation, so cackle at me if ya want!! :)
After coloring (and blending) Dorothy's dress, I added some dots and stitches with my white Signo pen...  I also added her (and Toto) to one my Wiggle Wires (have you seen my FUN and EASY tutorial for these yet???).....
...  And whooooooaaaaaa!!  They are wiggling with the Twister there.....
....  tee hee  ....  Too much FUN!! :)  Don't ya just LOVE Dorothy's red sparkly shoes???  :)  **BEEP**BEEP**BEEP**  I'm interrupting this post to say...  The tag that I stamped on can be found on the Creative Memories Traveler Cricut Cartridge (available here)...  We've been challenged to use only ONE Cricut Cartridge ALL week for the Getting Cricky Pre-Hop Preview Week...  I have a stack of cards to share with you over the next several days, so be sure to check back tomorrow (and the next day and the day after that too!!)...  And be sure to check out the links HERE if you'd like to play along with us this week... **You will now be returned to the regularly scheduled blog hop post...**

I'd also like to share a really FUN project that I made this past November for my very special friend (and Decorate To Celebrate! co-host) Rhonda!!  :)  If you've already seen this and want to skip along to the next stop, please scroll down...
Rhonda really loves the Wizard of Oz (I think as much as I do!!), so I wanted to make something FUN that was really "me" and that she would always be able to treasure...  So what better than Dorothy's HOUSE that landed on the Wicked Witch???
The stocking feet were created by rolling two lengths of white cardstock, coloring them to look like striped socks, and bending them to look like feet...  This was probably the hardest thing for me to figure out on the house...  Sigh......  :)
I punched a scalloped strip and used it as a template for the roof -- I simply sponged black ink onto the roof to give the effect of shingles...  Much quicker than adding many layers of scallops!! :)
The base of my "transformer" explosion box is a basic square box...  I decided to make the top extend all the way down so that I could include "layers" of the events in The Wizard of Oz...  First, the house has to be "picked up" by a swirling tornado!!
See the tornado layer???  :)
When the house lands on the witch, Dorothy has to "follow the yellow brick road"...  So the yellow brick road wraps around and extends beyond the regular base....  That cool die cut with all the characters was a last minute find that I treated like an extra "fold out"....
Doesn't that just make you SMILE???  :)
They must get through the Enchanted Forest...  So the next layer represents the trees, leaves, and whomping branches!!
"I'm melting!!"  (those of you who have seen the musical "Wicked" know this scene is forever changed...  At least, it's not as scary for me now as it was when I first saw it many, many, many years ago!!)...  The background is meant to represent the castle...
I'll bet you can guess that the EMERALD GREEN layer is meant to represent....  The Emerald City...  TA-DA!!  :)
And there's Rhonda, ahem, I mean, GLENDA amidst a myriad of RAINBOW colors to lead Dorothy home....
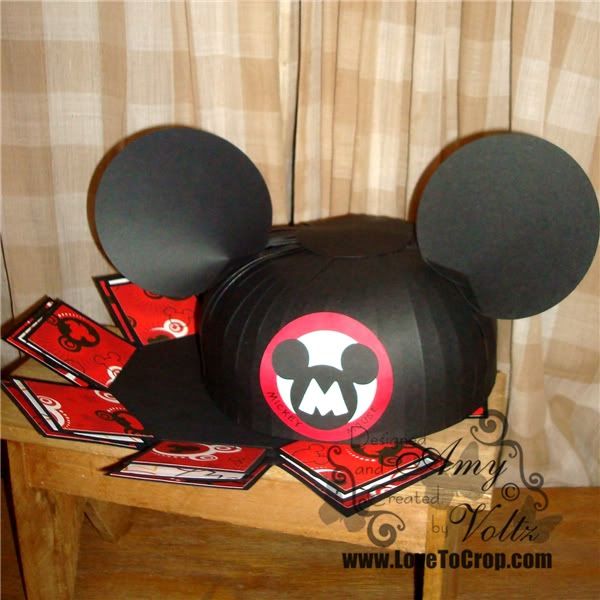
I hope you've enjoyed my Wizard of Oz projects today!!  If you'd like to see my other "transformer" explosion boxes, please CLICK HERE -- From a swimming pool to a birdhouse to a haunted house and a Mickey Mouse hat, I love making these boxes!!  :)  Thanks so much for stopping by!!  If you'd like to leave a comment, I'd love to hear from you...  I don't have any "planned" candy for this hop, but I am randomly selecting comments from all of my posts this week to receive some small goodies...

Now it's time for you to skip off down the Yellow Brick Road to Ashley...

And just in case the forest isn't cooperating (or the flying monkeys carry off a link), here's a list of the entire hop...  Updated to take you to each hop stop (even if you're making the trip later in the week)....

Wizard of Oz Hop

Amy  You are HERE now!! :)
Ashley  Go here NEXT!!


 Until next time,

Saturday, February 11, 2012

Cards for Emily Blog Hop -- Day ONE: Sending showers of love....

Welcome to the Cards for Emily Blog Hop Day 1!!!
This is a 2 day hop so be sure to hop on back tomorrow for some more inspiration! :)

If you came from Faith Abigail then you are in the right place! If you just happened across my blog and are interested in the entire hop and Emily's story, start back at Michelle's blog at Scrappin' For Kenzie!

Scrappin' For Kenzie Blog Hop

Emily is a sweet little 6 year old girl that has battled Leukemia since before Chrstmas 2011. She has had to endure more pain in a few short months than most adults in their entire life. She has gone from Leukemia to Rotavirus, to pancreatitis, to kidney stones, then to shingles, not to mention over 300 pokes in her tiny little body! From chemo to blood draws to feeding tube. Her bone marrow is finally at 0.00% so she is now in remission and back at home! She is still going through 7 different chemotherapy treatments but is finally doing better! To read her full story and updates please visit the original Cards for Emily info post HERE

For this hop all we ask is that you hop through the list, then when you are done, link up your card for Emily at Scrappin' for Kenzie. To link up now, simply click on the "Cards For Emily" button right here in my post!!

REMEMBER: There is no requirement to leave comments or even hop through all of the blogs if you don't have time. There will be no personal candy at any of the stops along the way. That way you can get maximum inspiration to make your own card and have enough time to link it up and send it away!

There WILL, however, be a giveaway to one lucky winner that links up a card by February 29, 2012. You can link up as many cards/projects that you would like. The more you link up and send the greater your chance is of winning a.....

$20 gift certificate to

 Their etsy store has over 100 stamps to choose from!

Now on to my card for Emily!
I wanted to send Emily a bright and CHEERFUL card...  And what says CHEER like a RAINBOW of colors???  :)  This sweet Digi Darla image ("Timmy Turtle") seemed like the perfect way to let this little girl with a HUGE amount of courage know that on the "rainy" days, we want to shower her with LOVE...
Your card for Emily doesn't have to be super fancy...  A colored image (mine is colored with watercolor pencils!), a bright and FUN sticker, or a die cut image backed with a few layers of colored cardstock, and VOILA!!  You've brightened the day of my friend Michelle's sweet little niece...
If you're not sure what sentiment to add to your card, use a stamped sentiment (this one is from the "Splashtastic Summer" Stamp Set from K Andrew Designs)...  Any CHEERFUL sentiment will do -- "Dropping by to say HI!" or a simple "Hello!" would bring a smile to any child's face!!  :)

Thank you sooooo much for joining us in this great cause for Cards For Emily!! We REALLY REALLY hope you will participate and link up your card to put a smile on this very beautiful, very deserving little girl that Michelle is honored to call her niece. :)

Your next hop in the line up for day 1 is Elizabeth!!

Happy Scrapping!!  Hope to see you again tomorrow for more inspiration -- And we'd LOVE to see the card that YOU create and share!! :)

Here is the line-up for Day 1 in case you get lost along the way. Be sure to come back tomorrow as we have all new projects and some new designers!

Michelle  START HERE!!
 Amy   You are HERE!! :)
 Elizabeth  Go here NEXT!!

Visit Michelle when you are all the way through or jump here now to link up your card!

Until next time,

Wednesday, February 8, 2012

Decorate To Celebrate -- Challenge #18 -- You're Invited to a PINK PARTY!!

Happy Wednesday, friends and followers!!  I had a bit of a hiatus from decorating my celebrations at the Decorate To Celebrate! Challenge Blog, but I am SO HAPPY to be back to creating some FUN party supplies and decorations again!! :)

The NEW Challenge at Decorate To Celebrate! is to create a party favor, treat bag, banner, sign, decoration, or any other party-themed project (as long as it's not a card or a layout) for a PINK Diva/Princess Party!!  I actually had a LOT of fun making a few items for this theme, wanna know why???  Cuz I had a little inspiration and encouragement from my friends, Dawn and Cecilia!!  :)  My mojo had taken a teeny-tiny vacation this week, and when your mojo takes a break, it's always a good idea to surround yourself with positive people who inspire your creativity!!  Wait til you see what great ideas my positive peeps helped to inspire.....

When the night was over (and some of the wee hours of the morning too!), this is the end result of the creative FUN.....
.... A princess wand (with a secret), simply fabulous placecards, and treat boxes complete with a tutu!! :)  All of the papers for this project are from My Mind's Eye Lost & Found I Collection -- The-Turtle-Cat would really love this paper as it is covered in glitter...  And you know how she loves GLITTER!!
I started off with this adorable "take out container" treat box -- This is cut from a 12x12 piece of cardstock using an Accu-Cut Die...  The "tutu" is a crepe paper "ribbon" from My Mind's Eye...  I just love the effect created by adding it to the box!!  The handle was created after much inspiration and discussion from Cecelia and Dawn -- We tried a chain, a chain threaded with ribbon, and wire with a different combination of beads first...  But when we came up with this combination, we all agreed that it was PERFECT!!  :)
Dawn found these little "dream-catcher" accents in with a stash of beads, so I added a few of those -- I think it's what put the "Diva" in these treat boxes!!  :)  A few strips of scrap paper made a sweet tag to stamp "Hello Friend" from  the "Fashionable Friends" Stamp Set from K Andrew Designs...
Next, I used another Accu-Cut Die to cut the pink cardstock for these placecards...  The edges were distressed with Tim Holtz's Spun Sugar Distressing Ink (as were the edges of the damask cardstock layer underneath)...  To tie the placecards in with the treat boxes, I added a wire of matching beads to the top corner of each card...  It took a little creative stamping, but I managed to find a "the" on the "Let's paint the town red" stamp in the same "Fashionable Friends" Stamp Set so that I could stamp "the simply fabulous" before adding each Diva Party Guest's name (cut from glitter paper using a Sizzix alphabet die strip -- sorry, the font name escapes me at the moment)....
Finally on a creative roll, I decided to create a Princess Wand (cuz what Diva Party Guest isn't a PRINCESS???)...  So, I took a LARGE Pixy Stix candy and wrapped it with paper before wrapping it with the seam ribbon that came with the "tutu" ribbon...  I then cut two 3"x12" strips of cardstock and scored them every 1/2" to create the rosette (attach ends of scored and folded strips to create a circle, then press the center together and adhere with strong adhesive or hot glue before adding embellishments to front).  I punched a large scallop with a Marvy Uchida super huge punch, adhered the remainder of the "tutu" crepe paper ribbon, and added a "Princess" tag from a sheet of My Mind's Eye embellsihments...  Since the crown needed a little sparkle, I added some KaiserCraft bling (the package on hand was clear, so I colored them with a pink Copic marker for a perfect match!!)...  What princess wouldn't enjoy this wand (especially knowing that it's still filled with some sugary goodness!!)?
Since The-Girl-Child has a birthday this month, I suppose she'll be the recipient of these super-fun PRINCESS goodies...  I'm not 100% sure, but I think she'll enjoy having a namecard for her college desk that reminds her that she is "simply fabulous"....  :)

Now...  Pop on over to Decorate To Celebrate! and check out all of the other AMAZING projects created by the DTC Design Team...  There's even some EXCITING NEWS about our BRAND NEW Design Team Member....  Amy from Amy's Crafting Space!!  Amy has participated in MANY of the DTC challenges so it is AWESOME to have her as a part of the team!!  I'd LOVE IT if you would pop over to her blog and CONGRATULATE her on this new endeavor (you can click on her blinkie below)!! :)


Amy's Crafting Space


And when you're ready to add your creative project for a DIVA PARTY (be sure to use PINK), hop on over to Decorate To Celebrate! and LINK UP -- I can't wait to see what you create!! :)


Decorate To Celebrate!


Until next time,

Sunday, February 5, 2012

Lasting Memories Layout Challenge #74 -- We're Going Digital AND Digi Darla Blog Hop!! :)

Welcome to our first hop of 2012 at Lasting Memories!! If you've come from Denise then you're on the right track! If not, just click HERE to start at Lasting Memories and you'll also find all the details of the hop there! Please be sure to read through because this week we have a lot going on! We're being sponsored by Digi Darla which is PERFECT since this weeks challenge is "DIGITAL"!! 

For my layout today, I used Digi Darla's "Birdhouse Flowerpot"...
I made this layout to give to my mom for some of her BEAUTIFUL garden pictures that she'll take this spring...  We've had such a mild winter, and she's been a little worried about her flowers coming up early...  But I just know she'll have an award-worthy garden again this year!!
When I saw this digi stamp, I knew I wanted to feature it on a garden layout -- So I made it the focus of the page (until my mom adds those fantastic pictures at least!!).  I used my Stampin Up! Watercolor Pencils and a new-to-me (thanks, Christi!) blender pen...  To get the blended color on the birdhouse, I used brown, gold, and a touch of orange.  To get the dimension on the flower pot, I colored around the outside edge only and gently pulled the color to the center with the blender pen until I had the desired effect.  Since the stamp has a pot of daisies, I cut daisy layers (found on the Walk in my Garden Cricut Cartridge) at 2", stacked them in threes, and added the yellow centers -- I also cut some green vines (found on the Elegant Edges Cricut Cartridges and modified with my Gypsy) to use behind the daisies...
My layout title features the base and shadow font from the Calligraphy Collection Cricut Cartridge (welded with my Gypsy) and both font layers from the Cindy Loo Cricut Cartridge.  The font on Cindy Loo is one of my favorites because it's so versatile -- From little girl layouts to garden layouts and more, it's a beautiful font to have in your collection!! :)
One of the things I simply LOVE about "Digi Stamps" is that you can resize them to fit your needs!!  For my layout, I printed the digi stamp LARGE, but I also wanted to show you how easy it is to adjust the digi stamps for ANY project...
I created a fun "Thank You" card using the same "Birdhouse Flowerpot" image...  This time, I printed the image out at about 3.75".  I again colored the image with my watercolor pencils and blender pen.  I embossed the evergreen background cardstock with the "Daisies" embossing folder from Sizzix and added a strip of cranberry and deep blue cardstock (scraps from my layout above!! YAY!!)...
I added three red Kaiser Craft rhinestones to the top corner of my card (gotta have my BLING!!) and stamped the "Thanks" sentiment (found on the "Winter Wishes" Stamp Set from K Andrew Designs) three times (inside says "...a LOT!!") before punching them out with my new SU! Word Window Punch...  I'm super excited about my new punch (a wonderful GIFT from my Uber-bestie, Christi), especially since using it on this card means I can enter it in the challenge over at Celebrate The Occasion (have you visited THERE yet???  If not, consider yourself invited to check it out!!)...
Thanks, thanks, thanks a LOT for stopping by to see my layout and "Thank You" card!!  I hope you'll become a follower and visit often!!  :)  I'd love for you to leave a comment with YOUR blog address so that I can visit (and follow) you as well...

Now it's time to hop onto Kim for more inspiration!! Oh and one more thing!! We're also including our friends from Digi Darla's DT in our blog hop and we'll finish up at Digi Darla's Designs where you can view her newest releases and more!! Once you've had a look around, leave Digi Darla a comment and let her know which image is your fav for your chance to win 5 of her images!!!

Be sure to join us and show us your digital creations for a chance to win Karen's giveaway! All the details can be found at Lasting Memories .. Here's your master list in case you get lost (clicking on the links below will take to you directly to each participants post for the hop)... happy hopping!!!


Digi Darla Blog Hop


LASTING MEMORIES DT

Amy You are HERE!! :)
Kimberly Go here NEXT!!
Jennasa

DIGI DARLA'S DT
And Our Friends from Digi Darla's are doing ANYTHING digital - doesn't have to be a layout!!

Beckie

Not part of the hop, but a few of my Lasting Memories Design Team Sisters who have a Digital Post to share:
Julie
Tina

Thank you for hopping with us and be sure to come back and play a long with us!!! Here's a sketch from Heather at Scrappy Sketches for inspiration as well - REMINDER: sketch is OPTIONAL - only layouts following our challenge are eligible for giveaways.

Until next time,

All About LOVE Blog Hop -- DAY TWO -- All you really need is....

Welcome to DAY TWO of the "It's All About LOVE" Blog Hop!!

We're so happy you could join us for this super-fun hop showcasing cards, layouts and projects that feature anything and everything all about LOVE!! You'll find an array of ideas throughout this hop -- From decorations to gift ideas and more, we hope you'll enjoy each and every project along the way!! Be sure to leave a comment at each hop stop to be entered in our Monthly Drawing (details available at http://memoriesintyme.blogspot.com)

If you've hopped over from Lisa, then you are in the right place!! If you've just popped in to visit my blog or are reading this via email and you'd like to join our FUN, then please go to Lynda's blog to start at the beginning...

For the hop today, I've created another fun Valentine card -- This time for a friend of mine (she'll know who she is cuz she'll recognize that bag in the background)...
My card today features a squeaky-CUTE digi stamp from Meljen's Designs...  I was lucky enough to grab this one as a FREEBIE a few weeks back on Meljen's Facebook Page (if you're not a fan over there, please pop over, LIKE the page for YOUR chance at grabbin' some FREEBIES, and please let her know I sent you)!!  :)

I really wanted this cutie of a mouse to be the focus of my card, so I stamped my sentiment on the inside of the card...  The sentiment "All you need is Love... and a lot of paper" can be found on the "Crafty Friends" Stamp Set from K Andrew Designs -- Isn't that just the SWEETEST???  Yesterday, I received a gift that has been on my "Wish List" for YEARS -- as well as a few other goodies -- from my Uber-Bestie, Christi!!  So I think she'll like this card LOTS...
The purple layer on the front of the card is embossed with the Sizzix "Hearts and Vines" embossing folder.  The hearts on the inside sentiment layer were punched with the Creative Memories "Love Struck Maker"...
 Thank you again for checking out my projects...  I'm the LAST STOP in this hop; however, if you missed anyone (or if you missed YESTERDAY'S post), be sure to follow the links below and remember to visit all the stops for MAXIMUM ideas and LOTS OF FUN!!


LOVE Blog Hop


Until next time,

Saturday, February 4, 2012

All About LOVE Blog Hop -- DAY ONE -- Valentines for Him and Her... :)

Welcome to DAY ONE of the "It's All About LOVE" Blog Hop!!

We're so happy you could join us for this super-fun hop showcasing cards, layouts and projects that feature anything and everything all about LOVE!! You'll find an array of ideas throughout this hop -- From decorations to gift ideas and more, we hope you'll enjoy each and every project along the way!! Be sure to leave a comment at each hop stop to be entered in our Monthly Drawing (details available at http://memoriesintyme.blogspot.com)

If you've hopped over from Lisa, then you are in the right place!! If you've just popped in to visit my blog or are reading this via email and you'd like to join our FUN, then please go to Lynda's blog to start at the beginning...

For the hop today, I've created TWO fun Valentine cards -- One for a girl, and one for a boy (hmmmm...  I wonder who will be receiving these???)...
My first card features a super sweet digi stamp from Digi Darla's...  This "Bear Next Door" is this week's FREEBIE, so be sure to pop on over to pick yours up!!  While you're there, be sure to check out the challenge -- You could even enter to win some Robin's Fetish Digi Stamps too!! :)
I was sure to add plenty of SPARKLE to my card with some iridescent Stickles -- What's a girly Valentine without a little GLAM???  :)  If you're already a follower of mine, then you might remember that I don't own a single Copic (yet!), so I color all of my images with Stampin Up!'s Watercolor Pencils and a blender pen...  I feel like this might be getting a little easier than when I first started (does that mean it's time to take the Copic DIVE???)...
For the design of my card, I decided to use one my favorite border punch tutorials from OWH...  I love the way the layers of this design create so much dimension -- When I'm stuck on a card, I often find this is still my favorite way to make a card!!  :)
I stamped my sentiment on the inside of the card, atop a trio of hearts...  The sentiment "from the heart" can be found on the "Crafty Friends" Stamp Set from K Andrew Designs.
My second card features an adorable digi stamp that I picked up from Dustin Pike over at Doodle Dragon Studios...  This particular monkey was part of a set of three monkeys hanging from one another's tails...  I printed just the one and wrapped the vine where the other guy's tail would have been...
For a little extra FUN, I added some Glow-in-the-Dark googly eyes!!  Oh, by the way, since this week has been all about Wiggle Wires for me -- This is a different "take" on my Wiggle Wire Tutorial -- Instead of floral wire, I found this ivy wrapped wire in my ribbon stash and decided it made the PERFECT "Wiggle Wire" for my monkey!!  I pierced the end of the ivy vine through one of the double layer hearts and used red tape to adhere it at the top corner of the card...  Now the monkey can wiggle and jiggle to his hearts content!!  (For my full "Wiggle Wire" tutorial, please CLICK HERE...)
My double layer hearts were all punched with my retired Creative Memories Heart Punch...  I added the "Hello" and "Love" stamps to two hearts for the monkey to hold.  These fun mix-n-match sentiments can be found on the "Food For Thought" Stamp Set from K Andrew Designs...
Thank you again for checking out my projects...  I'm the LAST STOP in this hop; however, if you missed anyone, be sure to follow the links below and remember to visit all the stops for MAXIMUM ideas and LOTS OF FUN!!


LOVE Blog Hop


Until next time,
 
Blogging tips