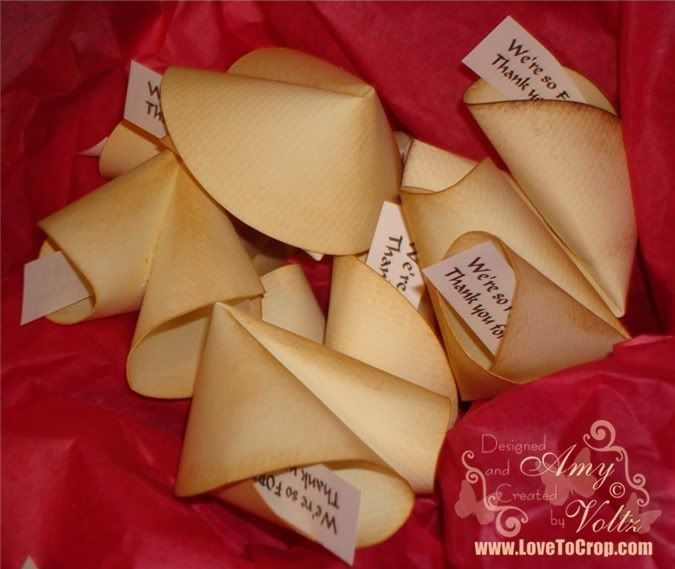
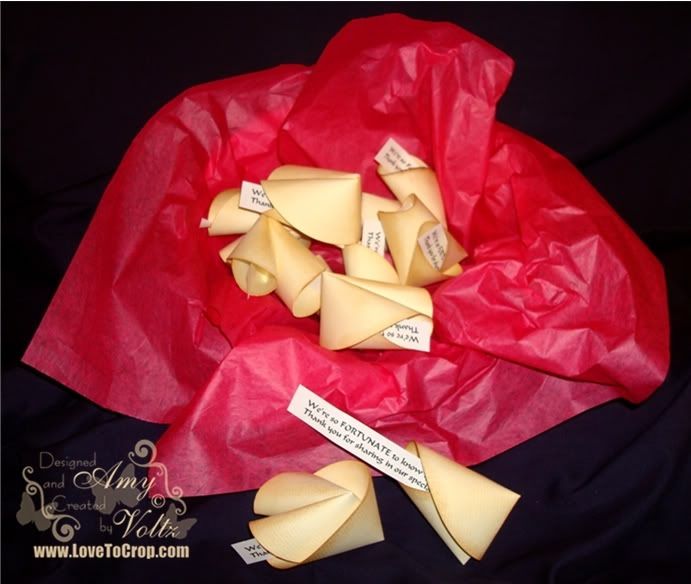
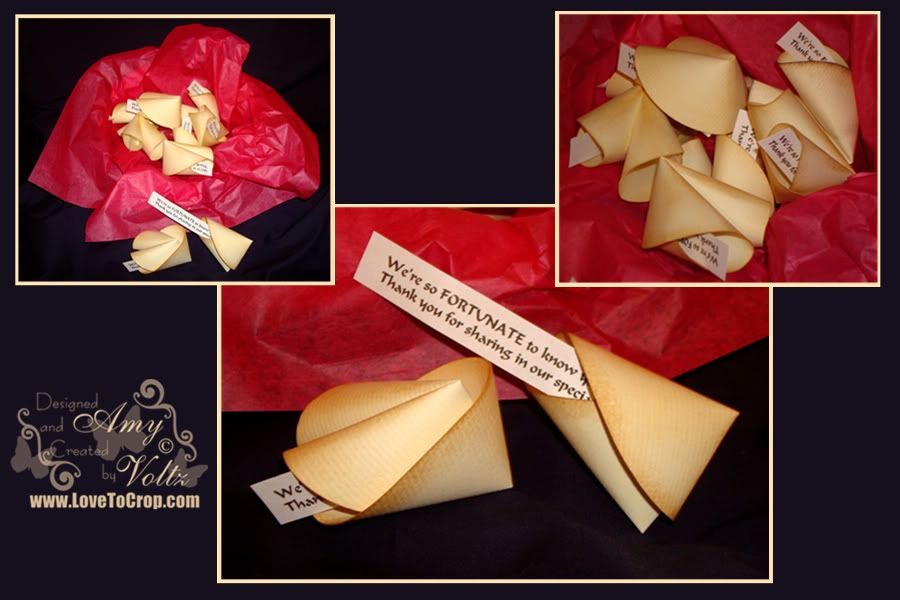
I first saw paper fortune cookies like these a few years ago at a craft fair -- I loved them so much that I remember buying several of them for about $1 each... They had lovely little tags inside that had messages of friendship so I had passed them on to a few friends hoping they would enjoy them as much as I did. I haven't thought about those little fortune cookies much since then until just the other day when I was thinking about cute party favors. The ones that I had purchased were made with bright patterned paper, but I wanted to try to make mine look as 'realistic' as possible...
Of course I did not keep one of those fortune cookies that I purchased so long ago for myself, so I spent some time playing with the paper (and eating a lot of REAL fortune cookies to see how they looked!!) to get the folds right...
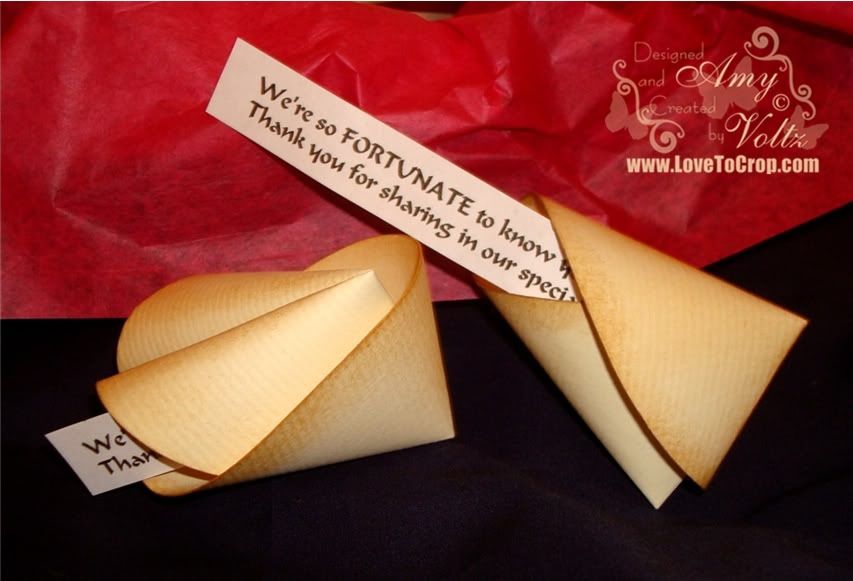
These little favors are perfect for so many occasions -- Graduation parties, birthday parties, weddings, and showers!! My fortune slips read: "We're so FORTUNATE to know you... Thank you for sharing in our special event!!"
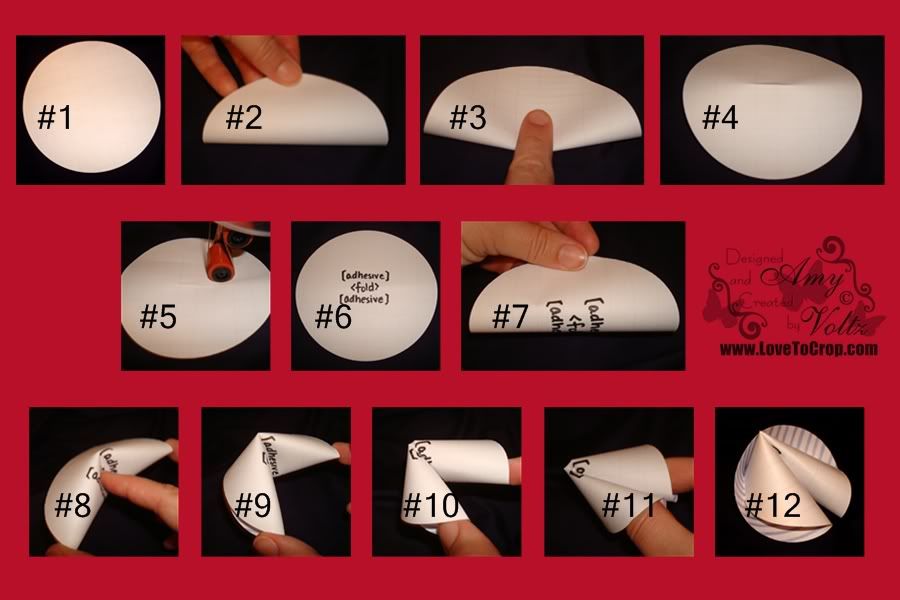
To make these darling calorie-free favors for your next celebration:
- Cut the circles from ivory cardstock at 4.25" (I used my George Cricut Cartridge; however, any cartridge with a plain circle will work. I tried with smaller circles, but I couldn't get it to fold correctly). Ink the edges of the circles with SU! Creamy Caramel ink (optional).
- Start to fold each circle in half...
- ONLY pinch the center of the fold (so there is a crease at the center of the circle)...
- Lay it flat again.
- Use STRONG adhesive (I used my ATG gun)...
- Apply adhesive on both sides of the crease (about 2" in length of adhesive).
- Bring the two edges (opposite of the way you folded in #2) of the circle towards each other and...
- Gently push that pinched crease in...
- So that it will collapse the rounded tube-like center of the circle...
- Continue bringing the edges back towards each other and...
- Press the adhesive firmly to hold the edges together.
- Voila!! You have a paper fortune cookie!! If you would like to add a fortune to the inside, cut your fortunes into strips and add a strip inside the fold at step #7.
In the meantime, I'd like to remind you that it's the FINAL WEEK to enter to win our GRAND ANNOUNCEMENT GIVEAWAY at Decorate To Celebrate! This BRAND NEW challenge blog is dedicated to showcasing YOUR party creations!! Whether you make treat bags, centerpieces, banners, gift bags, invitations, cupcakes, or any other party-related project, we want YOU to link up and get noticed!! Our first official challenge begins NEXT WEDNESDAY (June 1st) at 8am with a "Father's Day Party" theme... So celebrate Dad and Decorate To Celebrate! with us!!
Not only are we offering a one lucky follower a Surprise Gift Box filled with goodies OR a $50 Creative Memories Gift Certificate (which can be used towards the Stork's Delivery, Cheerful Seasons, or Reminisce Accents Cricut Cartridges!!), but Rhonda is also custom-making one of her BEAUTIFUL mini-albums for a lucky, lucky winner when we reach 100 followers by May 31st!! We're SO close to the 100 -- And there are SO MANY chances to WIN!! Be sure to stop on over now and sign up for YOUR chance(s) in the drawing!! :)
Thanks so much for joining me today!! Until next time...






































17 comments:
You are sooo clever and these are adorable. I'm with you on making them look realistic. Thanks for the pic. tutorial. It makes the process very easy.
I so am craving a tasty fortune cookie now. Those look soooooo real. You did fantastic. I think brightly colored ones would through of the authenticity a little, great thinking to make them look realistic. I have to note this so I don't forget where I saw it...Smilez
That is so cool! These would be great for a New Year's Eve party...
Awesome idea! They look so real! Great job and excellent directions.
What a cute idea, I just love them!!!
these are the cutest and they look so real I am definetly going to try some thanks for sharing the directions. hugs
Adorable cookies! great tutorial!
This is great! Thanks for the directions too. I am going to try it this weekend.
http://comopark1886.blogspot.com/
Aren't these super fun! I've made them before and forgot about them, thanks for the inspiration!!
These are so adorable....and I will definitely try to make some for myself.....
Your tutorial is so helpful and easy....love your blog too....thank you for sharing this awesome and fun project...
love these fortune cookies - i have an idea in using them for a baby shower --- using pink paper!! thansk for sharing - love your blog. hope to win something!!!
maureen
mo_sala@pacbell.net
These are too cool! I am so gonna try to make them...you make it look so easy so here's hoping I can pull it off!
TFS!
Tisha
http://tishascraftcove.blogspot.com
These are too cool! I am so gonna try to make them...you make it look so easy so here's hoping I can pull it off!
TFS!
Tisha
http://tishascraftcove.blogspot.com
Howdy do, I am enjoying your blog, I am linking to you for the hop tomorrow, so I wanted to pop in and see what you had going here. Really nice work.
Now you've given me an idea. I will let you know if it works. Hehehe
Hugs
Brenda
Great idea! Fortune cookies are a must when you eat beef fried rice!
Thanks for sharing!
April
nginerd at gmail dot com
http://ajoy2scrap.blogspot.com
I love your fortune cookie recipe! They sound like fun! Thanks for sharing. Edwina Brown edwinabrown@comcast.net
Post a Comment