For my project, I decided to get started on decorations for The-Girl-Child's Graduation Party... In our little town, it's nearly impossible to reserve a building, a basement, or even a table during June & July, so we decided to wait until August... This worked out so well for The-Boy-Child's Grad Party last year AND it was a nice way to have a little 'send-off' for college...
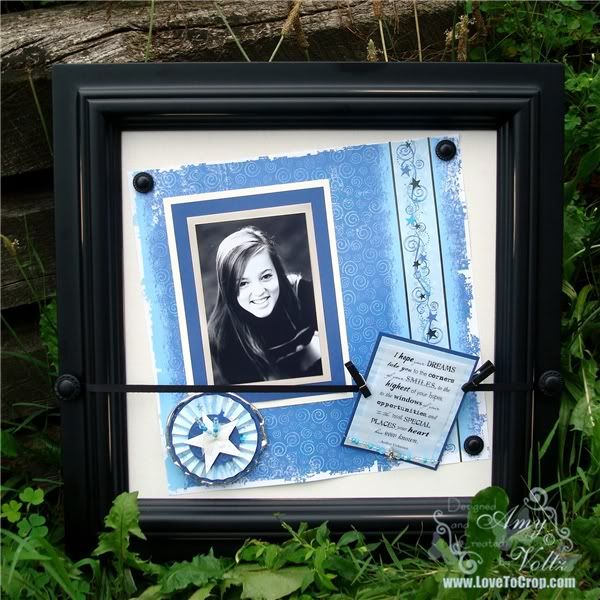
I started with an Everyday Display Frame from Creative Memories... The backboard is magnetic so that you can quickly change the layout to match your mood, a theme, the season or holiday... We have several of these displayed around our home -- It's fun to change them and see how long it takes before anyone notices (trust me, when it comes to pictures of themselves, they notice pretty quickly!!).
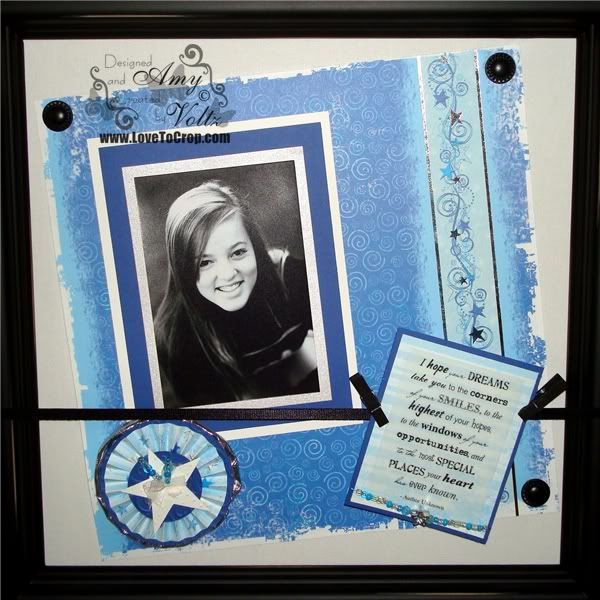
This is one of my very favorite pictures of The-Girl-Child... That beautiful smile is something I look forward to seeing every day -- And I'm not quite sure how well I'll fare without it in a few short weeks!! I triple matted this 4x6 photo on a silver 4.5x6.5 photo mat, a 5.5x7.5 blue photo mat, and a 6x8 white photo mat... The variation in mat sizes is designed to draw your eye to the photo first, so if you have a 4x6 photo that you want to focus on, this is a quick tip you can try for great results!! :)
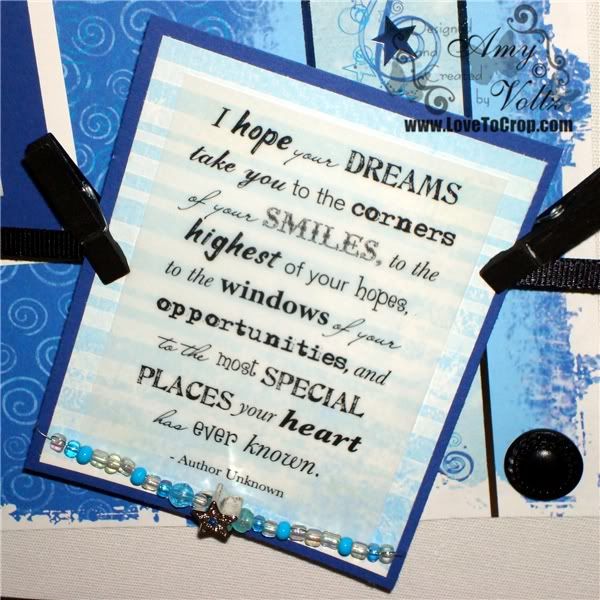
I absolutely LOVE this quote... I strung the beads on thin wire and attached it to the bottom of the quote. While this could easily be added to the layout when I transfer this to The-Girl-Child's album, I will probably create a journal and add this to the front of that instead (I can always add another copy of the quote -without the beads- to the layout, or I can simply add another photo or two -- the choice is up to me since this display board allows for me to move things around and change things up!!).
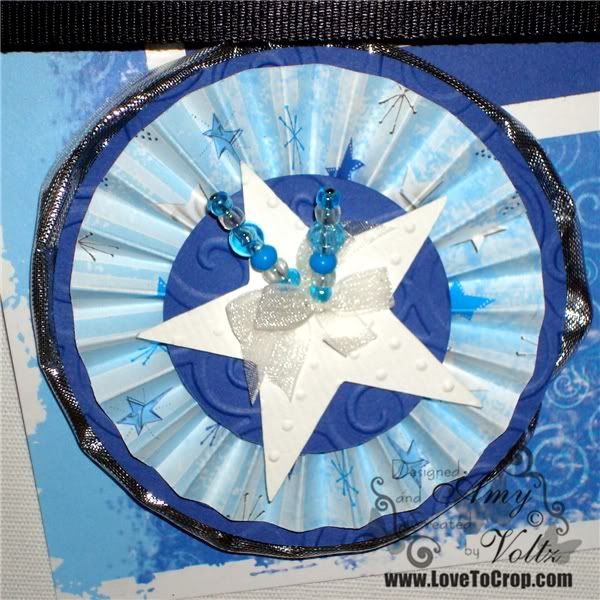
If you've been visiting me recently, then you know I'm all about the rosettes and handmade stick pins lately... My bloggie-land friend, Carri, did a tutorial on these stick pins months ago (see it HERE), and I've had so much fun making them ever since (I'd love for you to hop over and see her video -- while you're there, please tell her I sent ya!!). As for the rosette... I started with a strip of decorative paper that measured 12" long and 1.5" wide. I scored it every 1/4" and then 'fan-folded' it back and forth (a.k.a mountain/valley fold) before attaching the ends with strong adhesive (be sure not to twist it when attaching the ends). As soon as you join the ends, it will look similar to a cupcake liner... Have your liquid adhesive ready (a glue gun works even better if you can manage not to burn yourself while doing it -- ask me why I know to warn ya!) and press one edge out while pushing the other edge together and inward (basically, you're pressing it flat, but it needs a little help to squinch up in the center). Now quickly glue the center and hold it in place until it is dry (see why the glue gun is faster?)... Be careful not to glue your fingers to the rosette (ask me how I know, and, yes, I'm working on a photo tutorial, but I prefer not to have ALL of my fingers bandaged for it -- I draw the line at 3 band-aids). Believe me, the more of these you make, the more fun they are and the easier they get!! I added a 3.25" circle behind the rosette and a 1.5" circle to the front of the rosette (this helps cover up the glue too!). I embossed each of these with Cuttlebug's D'Vine Swirls. I then created a fabric circle from silver ribbon to go behind the rosette (2.5" wired ribbon -- gather the ribbon tightly on one side -- pulling the wire like a drawstring, then gently gather the other side slightly just so that it starts to roll on itself. Join the edges of the ribbon together and try to create a seamless edge.). The star is popped up on a foam square (I embossed it with Swiss Dots first). Added my two handmade stick pins, and....
Voila!! Done!! :) Got the 'thumbs up' approval from The-Girl-Child, so I was a happy, happy mom... While The-Turtle-Cat was slightly disappointed that we didn't get into the glitter, she was somewhat pleased when she discovered my bin of BEADS!! Oh, yes, these are much more fun for chasing and playing (but they don't get stuck to her tail as glitter does -- And she really does like to pretend she's a fairy spreading fairy-dust when she swings her tail from side to side)... Regardless, the beads are going under lock and key... The-Turtle-Cat doesn't need to get creative with beads while I'm sleeping. :)
I hope you will join me over at this week with your Blue & White Any Occasion project -- I'd sure LOVE to see what you create so click on the blinkie below to visit CTO and link up your project by Sunday night...

Now... Would you like to receive one of my rosettes (complete with stick pins)? All you have to do is a little bit of 'work'... aka bloggie-love :) Simply visit the CTO blog and find the list of NEW Design Team members (hint: they were ALL featured in last Tuesday's post)... THEN, pick FIVE and go visit their blog... Become a follower and leave them a comment letting them know that I sent ya... As soon as you've done that, shoot me an email (scrapbookingwithamy at gmail dot com) telling me who you visited -- be sure to include your address so I can send you one of my rosettes -- the color will be a surprise, but if you like this one, I'm sure you'll like the one I send ya too!! Be sure to do this quickly, as the offer (and the CTO challenge) is only open until SUNDAY, July 31st...
Thanks so much for stopping by, friends... Until next time,


































31 comments:
I really like this idea, very cute!!
Laurie
scrapsbysissy.blogspot.com
This is fabulous, I love everything about it! Love the rosettes, I've been making them to and I've discovered the hot glue gun is not my friend. Lol
Great job!
Your project is so beautiful! Thanks for stopping by my blog and leaving such nice comments this morning. So happy to be designing with you!
Hugs, Jenni
http://mylollipopgarden.blogspot.com
beautiful amy what a great idea on being able to change out the background. your daughter is very beautiful and wish her the best.
This is gorgeous, but I got teary eyed for both of us reading your post. Your girl child leaving for college & mine getting married, sniff, here I go again.....
I forgot to say thanks for all the comments you left for me, and by the way you can't be Snow White and a mermaid too, lol.
Wow!! This is amazing! Just love it.
Wonderful, wonderful frame!!!!
Your rosette is amazing, with the embossing on the star and the beads hanging from it!!!
Hi Amy,what a beautiful project(and daughter).I love that the base is magnetic and you can change it round.
The rosette and pins are amazing and how lovely of you to encourage others to visit us newbies.
Really pleased and looking forward to working with you at CTO.
Jayne
Oh Amy! I love this! You did a wonderful job! Nice take on the challenge.
Nicole
Very beautiful. Thank you for the matting tip.
Precious Hugs
So very pretty Amy, great job. FABULOUS! ~Shen
This frame is so adorable!
Adorable layout in a frame. TFS
circlebenterprises.com
Love your layout! Its great to be on the design team with you.
Sylvia
WOW! What a fabulous framed layout! The blue and white are great and I love the quote words!
Amy, I enjoyed reading your post. i love the idea of waiting until August for the graduation party. This is a beautiful project. Your daughter has a beautiful smile and it just makes the LO POP!! The poem is just the sweetest. And the many different fonts used make it even more so. i love rosettes. A wonderful touch, they always make. As you can tell, all in all, I just love this!!!
Charlotte
Love it Amy! What can I say Amazing
Hi Amy! So sweet of you to include me in your post! Glad you enjoyed my pin tutorial! I just used some pins today on a project I will be posting in a few days!
Your project is super great! Love all the fun details!
Carri~abusybee
www.doubleclickconnections.blogspot.com
Amy what a beautiful layout.. great job..
Ivette
Amy this is really pretty, and so is your girl-child! She will love that you did this for her party. Hugs, Pam at http://craftycards4u2.blogspot.com/
I am glad you put the close up pictures so we can see all the wonderful details that you put into this project. Love that you used a B&W picture. Very cute.
Judy
Amy, this is gorgeous, great job on the challenge.
DIANA L. CTO DT
http://dianamlarson.blogspot.com
This is gorgeous Amy, I love the entire color combo too. What a grand idea of being able to change it out, I guess they would notice if it was about them.
Hugs
Brenda
I would be honored if you came to see my blog here
What a beautiful project. This would make such an awesome gift! Great job~Absolutely beautiful!!
Sherrie K
http://sherriescraps.blogspot.com
Very pretty picture frame, great job as usual!
Bee-utiful project. Like the rosette stick pins. Like the chance to win one.
Melissa
"Sunshine HoneyBee"
http://CreatedbySunshienHoneyBee.blogspot.com
Absolutely beautiful frame and Daughter! I have a scar on my arm from the glue gun:-) Have a
cool' one now, Ha! The rosettes and instructions are great and I love the stick pins! I am going to have to try to 'win' one!!
What a great idea to have an interchangeable LO, love all the details :)
Love this!! It's absolutely beautiful! So happy to be joining you and the rest of the CTO team!
Hugs,
Tracey - CTO DT member
www.trailoftreasures.com
AWESOME!! This is gorgeous! Amy, your talent astounds me.I am so glad you stayed on the DT. :)
-Paper Panther
Post a Comment